The Other Side of the Hill:
A Miniatures Game of Napoleonic Skirmish Warfare in the Peninsula
Rules and Guidelines for Play
By Arofan Gregory. Copyright (c) 2020. All rights reserved.
Contents
I. Introduction
II. Figures, Terrain, Troop Types, and Equipment
A. Player Figures
B. Guerillas
C. Non-Player Figures
D. Terrain and Equipment
III. Playing the Game
IV. Guidelines for Non-Player Units
V. Actions
VI. Movement
VII. Fire
VIII. Charges and Attacks
IX. Morale
X. Scenarios, Tabletop Events, and Deployments
A. Scenarios
B. Tabletop Events and Deployments
XI. Winning and Losing
XII. Miniatures Needed for Play
Appendix: The Spanish Landscape
^ I. Introduction
"The whole art of war consists in getting at what is on the other side of the hill."
- The Duke of Wellington
The Other Side of the Hill simulates the experience of British skirmishers during the Peninsular War as they explore beyond the front lines into enemy territory. The British light infantry, riflemen, and their allied equivalents were in constant action throughout the war, and produced some of the finest soldiers of the conflict as a result of their experience. As players command such units to carry out whatever mission they have been given, they will encounter enemy forces, inhabitants, travellers, and potentially friendly guerillas. These will hinder or assist them according to their various inclinations. While in many ways a typical skirmish-level wargame, there are some important differences.
Perhaps the biggest difference is that it is a non-competitive game. Players are all British (or their allies), fighting against French (and other non-British) forces which are run by the computer and the referee. You can win or lose the game, but you do not win or lose against other players. The computer-assisted nature of the game is another major difference: all movement, combat, morale tests, and various types of game events involve the computer. Players dictate what their forces will do, of course, but everything else is more-or-less determined by the computer. This has the effect of speeding play, but it is a new type of game for some miniatures enthusiasts. It is designed to work not only on personal computers, but also on tablets and smart phones. Dice may be used for randomization in combat and morale if desired, but the app can also do this for you - this feature is set by the user.
Anyone interested in this period is likely to have read Bernard Cornwell's excellent Sharpe novels and/or seen the TV series and movies based on them. These served as an inspiration for this game. As you might surmise, this is intended to be a fun, fast-playing game first, and a simulation second. [Authors Note: I have always found the criticism of Cornwell's series as "unhistorical" as badly missing the point. It is supposed to be entertaining - that's the primary purpose. I mean, are the James Bond movies bad because they aren't an historically faithful representation of Cold War espionage? Bah!]
Like a lot of skirmish-level miniatures games, this system is designed for 25mm/28mm figures. It attempts to minimize the number of figures needed. However, as a result of potential computer-generated encounters with some forces, there is a minimum set of figures which will be required. The types and numbers of figures needed are addressed in their own section, below. You can, of course, use larger or smaller figures if desired.
While historically based, this game system does not represent any specific year during the Peninsular War, nor simulate any specific historical event. It does allow for scenario design on the part of the players/referee, but does not require it (there is an implicit default scenario), but it always involves a set of typical random events, with the goal of providing a gaming experience that captures the feel of the period from a skirmisher's perspective. Notionally, it is set during the years between 1811 and 1814, when Wellington was leading his army out of Portugal and across Spain against the French. Arguably, it could be extended further back in the Napoleonic period, to perhaps 1809. Since it depicts the low-level activity of British scouts and skirmishers - a constant feature of war in this theatre - the exact context is not paramount in importance.
I hope you enjoy this game in the intended spirit: as a fun way of simulating the experience of skirmish warfare in this colorful theatre of the Napoleonic wars. It is, after all, the light troops who are the first to get at whatever is to be found on "the other side of the hill"...
^ II. Figures, Troop Types, Terrain, and Equipment
There are several types of figures involved in this game. All are mounted individually. Although designed to be played with 25mm/28mm figures, the game can be played with other sizes of figures as well. For 15mm and smaller scales, players may optionally halve all distance measurements, or use centimeters instead of inches. For larger scales, players may wish to double such measurements.
Figures will be divided into two classes: Player figures and Non-Player figures. Each is described below.
^ A. Player Figures
Player figures are always British (or their allies - no reason not to field a unit of Portugese cazadores if you want). These represent the types of troops used to perform reconnaisance and scouting duties during the Peninsular War. They include riflemen, light infantry, and light cavalry. At a stretch, for a large force, a gun of the Royal Horse Artillery could be included. Guerillas are also Player figures - these are a special case and will be described separately. Player figures should be organized into units of from 8 to 24 figures, each unit having an officer and/or an NCO. Cavalry are more powerful in this game, and should thus be represented with smaller units. Generally speaking, there should be no more than half a dozen Player units on the table. Players may also wish to have a commanding officer for their force, who can be a mounted or dismounted officer, as appropriate. Larger units (and larger Player forces) will permit easier survival on the tabletop, but having a single Player unit is feasible.
Player figures are assumed to be Veteran unless players decide otherwise (in a large force, especially, you may wish to designate some units as Average). Officers and NCOs are always Veteran. Within the force, if composed of riflemen or light infantry, one figure (or more) may be designated as a Marksman. Riflemen are usually armed with Baker rifles (Rifles in game terms). Rifles can be fired also as if they were muskets (see below), as Napoleonic riflemen were issued with two types of ammunition, the one easier to load than standard rifle ammunition, but also less accurate. Some rifle-armed units (such as the KGL 2nd Light Battalion) were only partially armed with rifles, some carrying muskets. Players may decide to arm and equip their riflemen as they wish. Cavalry would be equipped with carbines. Officers would typically carry pistols. (No accomodation is made in this game for frabjous weapons such as volley guns. And you don't get to make love to the beautiful villainess either. Live with it!)
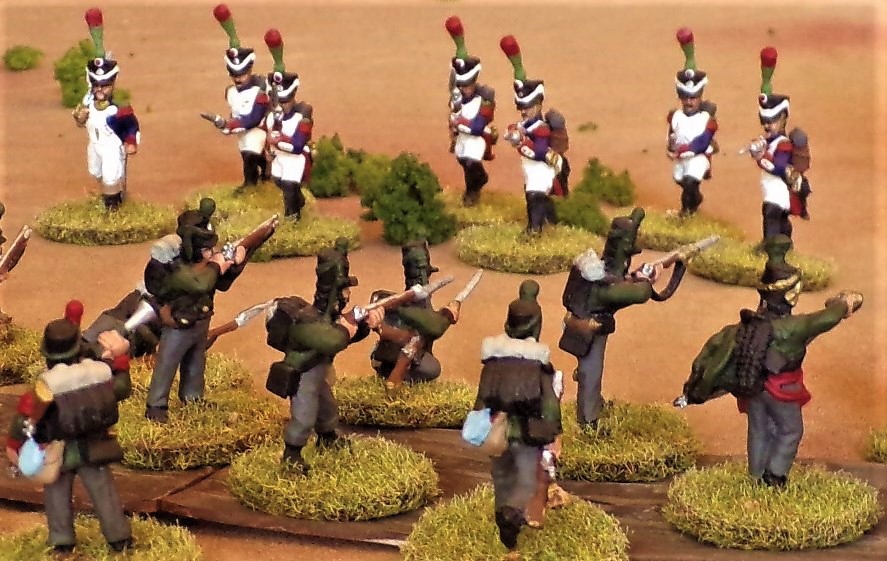
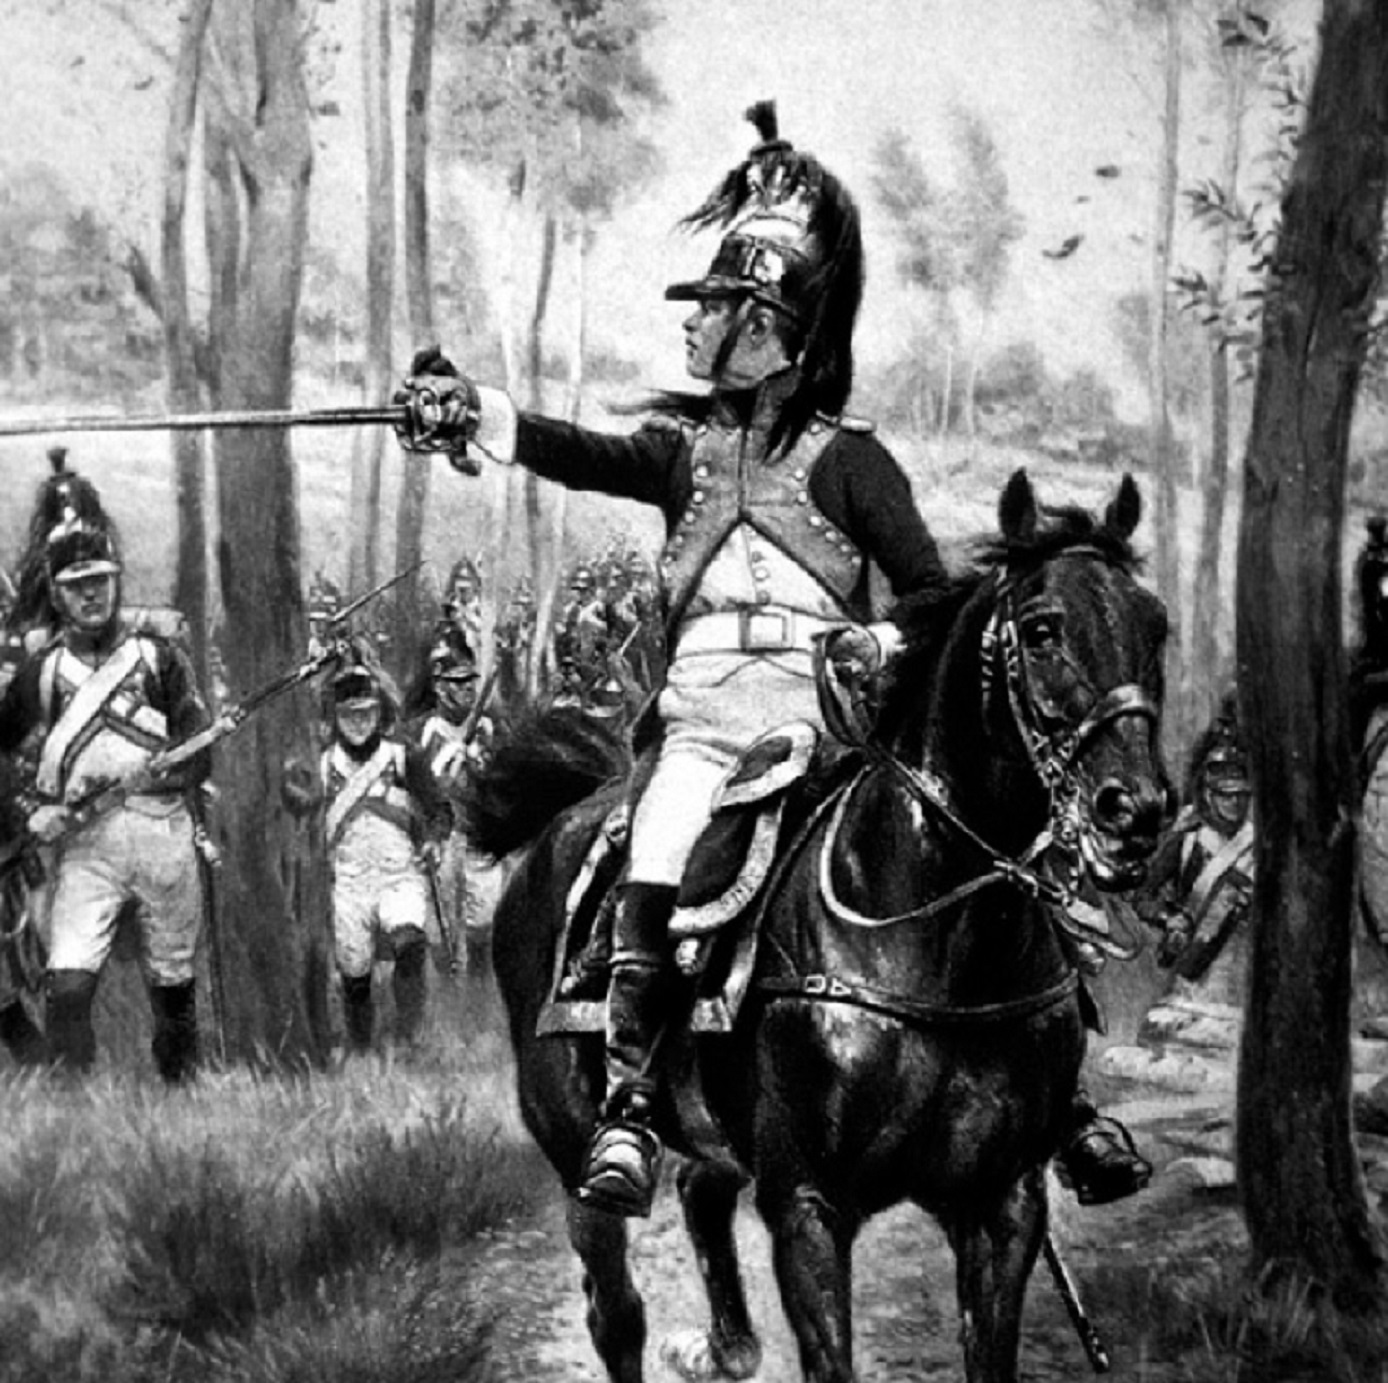
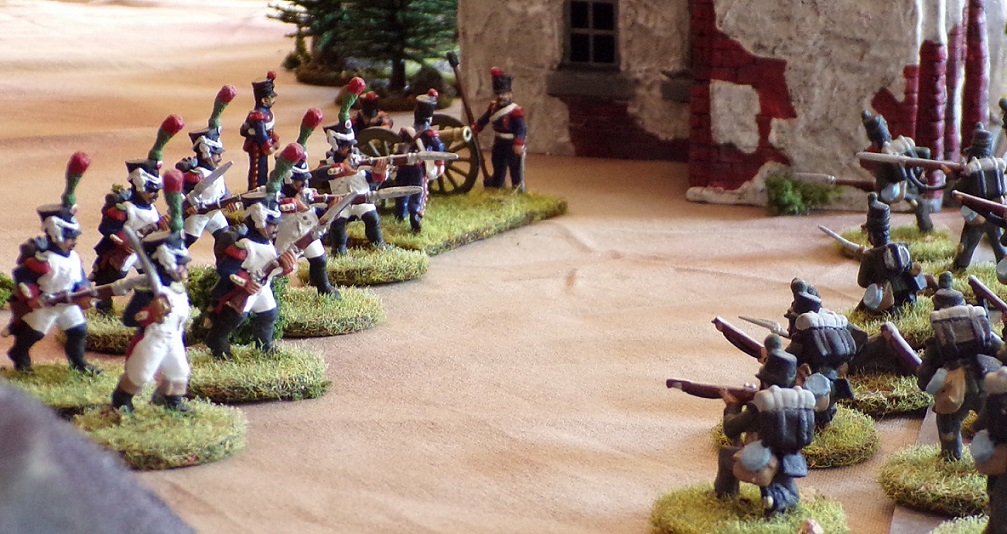
Riflemen face off against French elites.
^ B. Guerillas
Guerillas are semi-formal military groups formed from the Spanish population disenchanted with Napoleon's rule and that of his puppets. They do not form a part of Player forces, but appear on the tabletop when and where indicated by the program, in the same fashion as Non-Player figures. Once they appear, the Player takes control of them (just like any other Player unit) by moving any friendly figure within 6 inches of them. Until that point, they will be classed as and behave like Non-Player figures, run by the referee.
Guerillas may be mounted or dismounted, and will typically be armed with close-combat weapons, pistols, muskets, and/or carbines (count blunderbusses as carbines for game purposes). They can be rifle-armed if players want (and can find the figures). They may include armed clergy among their number for the purposes of tabletop representation - these are the same as other guerillas for game play. Unless players specify otherwise, guerilla figures will be armed as modelled. The quality of Guerilla units is specified by the program (typically as Average).
^ C. Non-Player Figures
There are a larger number of different types of non-player figures, as these represent not only enemy soldiers but also civilians. Each type of Non-Player figure is described below.
A Note on French Troops: During this period, Napoleon was - after the initial invasion when Wellington got into action - focused on central European campaigns and the invasion of Russia. As a consequence, Spain was seen as a "hardship posting" by the French army. Many of the troops sent there were second-line, including many of the Confederation of the Rhine units, foreign units, and new barely-trained French recruits. This was, of course, not always the case - there were some very good foreign troops (the Swiss, for instance, and some of the Confederation of the Rhine units) and veteran French formations (including some Imperial Guard units). Consequently, it is up to players to decide how to depict the French troops on the tabletop.
Functionally - and in terms of training, since this was typically deficient at this point - there was little difference between the French line infantry and the light infantry regiments during this period. This game makes no distinction between the two. (Note, however, that British light infantry and rifle regiments were given substantially different training than their fellows in the line regiments.) While players may wish to represent their French with members of the voltigeur companies of their respective types (line or leg�re), as those most likely to be engaged in this type of warfare, this has no impact on tabletop play. What is important is that troops of different quality be visually distinct on the tabletop. To achieve this, I use Rhinebund troops for my Conscripts (W�rzburgers), line voltigeurs for my Average infantry, and Imperial Guard fusiliers-chasseurs for my Veteran French (alternately, I use voltigeurs in leg�re uniforms).
For cavalry and artillery this is not as critical, because they are not so common in this game, and typically there will only be one unit in play at a time. Note that there was virtually no French heavy cavalry deployed to the Peninsula (a provisional regiment of cuirassiers and carabiniers, later becoming the 13th Cuirassiers. According to some sources, they didn't wear the breastplate.). Dragoons were the most common French cavalry used in the counter-insurgency role, and most types of light cavalry (hussars, chasseurs, etc.) would also be quite appropriate. (If you're feeling adventurous, you can always field the Lanciers de Berg [aka Chevaux-L�geres] - Polish lancer uniforms with "amaranth" [that's pink] facings!) All infantry will carry muskets (officers pistols), and all cavalry will be equipped with carbines except dragoons, who carry muskets. Artillerists, too, may be musket-armed, or armed with carbines if horse artillery.
There is no requirement that officers or NCOs appear with French units, except as specified by the game interface, which sometimes requires an officer. They can, however, be included in any French deployment. This has the effect of reducing the ranged combat abilities of the unit by replacing a regular soldier with an officer, while enhancing unit morale (for Conscripts and Average troops). The ratio of officers to men is left up to the players, but as a rule of thumb include an officer/NCO for units of 10 figures or more. As for Player figures, officers and NCOs are always classed as Veteran.
Conscript Infantry: Conscripts move more slowly and fight less effectively than Average soldiers, although better than civilians. Conscripts will tend to be more numerous when they appear on the tabletop. They represent soldiers with little or no combat experience, but who have been at least minimally trained in the business of war. Note that Spanish Bandits are typically classed as Conscripts.
Average Infantry: Infantry with some combat experience and training, but without the esprit de corps which would make them better soldiers. They move faster and fight better than Conscripts, but not as well as Veterans. Long-term French veterans of the Peninsula who have become disillusioned would fall into this category. Average troops are the most common type in the game, and will include many French infantry and almost all cavalry and artillery. Guerillas are typically classed as Average.
Veteran Infantry: This includes well-trained and motivated troops, belonging to formations with sufficient esprit de corps to function well even in the tough conditions in Spain. They are faster moving and better combat troops than other types.
Cavalry: Cavalry are not classed as "light" and "heavy," as the heaviest French cavary in Spain you would likely encounter were dragoons. The quality of the mounts available in Spain was low. Consequently, cavalry are simply divided into Veteran, Average, and Conscript. British cavalry functioning as Player figures will typically be classed as Veteran. Cavalry move faster than dismounted figures in the open and on roads, and are better in close combat under such conditions. They are an easier target for fire, however, and also fire less accurately from the saddle. Cavalry may choose to dismount as part of any Move action (if you have the figures). When Firing, Moving, Charging, Attacking, or being fired at/attacked, make sure that the 'Actor Mounted' or 'Target Mounted' boxes are checked as appropriate.
Light Artillery: Artillery units are represented by a gun and 4 crewmen, plus (optionally) a limber and one or two drivers. There are two types of light artillery: light foot artillery, and light horse artillery. The difference between them is mostly in how well mounted they were, horse artillery being intended to keep pace with cavalry. For Fire actions, use the quality rating of the crew (Veteran, Average or Conscript) as the Actor. For movement, artillery is Transport, but with the "Actor Mounted" box checked for horse artillery. Crew are considered soldiers of the appropriate quality for targeting purposes. When horse artillery is limbered, crew are considered mounted soldiers of the appropriate quality for targeting purposes. French light artillery includes cannon up to 8#, and the 6# "Prussian" howitzer. The 5.5 inch howitzer is considered field artillery for game purposes, as are larger ones. (For British guns, a 9# and heavier guns are field guns - anything smaller is a light gun.)
Field Artillery: Artillery units are represented by a gun and 4 crewmen, plus (optionally) a limber and one or two drivers. This category includes French guns heavier than 8# (mostly 12#) and 5.5 inch howitzers and larger. For Fire actions, use the quality rating of the crew (Veteran, Average or Conscript) as the Actor. For movement, artillery is Transport. Crew are considered soldiers of the appropriate quality for targeting purposes. (For the British, this category includes 9# guns and 5.5 inch howitzers, which can also be mounted as horse artillery - rules are the same as for Light Artillery, above.)
Transport: This category includes wagons, limbered guns, mule trains, and any other form of slow conveyance. Transport are not allowed to perform offensive actions. (Note that crew/drivers may fire, charge, and attack if appropriate. They will do this as Soldiers of the appropriate quality, however, not as Transport. If riding on the transport, they are considered mounted for the purposes of firing, but not for charges or attacks.)
Bandits: Bandits are very similar to Guerillas, except they lack the semi-formal military discipline and patriotism. They are armed with pistols, carbines (including blunderbusses), and muskets, and may be mounted or dismounted. Their ranks will not include any armed monks. They are typically rated as Conscripts.
Deserters: Deserters are another flavor of bandits, but made up of those who have served in various militaries. Thus, they may be better soldiers than your typical bandit. Can be armed with pistols, carbines, muskets, or rifles.
Villagers: Villagers are a different type of Non-Player figure, in that they exist for the purposes of providing information to players. Once questioned (using a Parley with Villagers action) they are removed from play. Thus, it doesn't matter how many are placed on the tabletop when they appear. Two or three figures is sufficient. Villagers may not perform offensive combat actions. When contacted by enemy troops, they are removed from play.
Monks/Priests: Monks/Priests are similar to Villagers, in that they exist to be Parlayed with, and are then (usually) removed from play. It is possible to encounter afrancesado armed monks who will attack, so having a few armed monk figures is a good idea (plus they can double as Guerillas). When armed, Monks/Priests can have pistols, carbines, muskets, or only close-combat weapons. Only armed Monks/Priests may perform offensive combat actions (when acting as afrancesados). When contacted by enemy troops, they are removed from play.
Aristocrats: These represent non-military travellers, which may be Spanish or British gentry. They have different attitudes towards the British military, depending on who they are. They can sometimes be a good source of information. Like Villagers and Monks/Priests, once they are Parleyed with they are removed from play unless needed for further tabletop activity (being escorted, for example). Aristocrats may not perform offensive combat actions unless attacked, in which case they will defend themselves. When contacted by enemy troops, they are removed from play.
Enemy Headquarters: Enemy Headquarters are the staff of the French army, represented by officers and staff members, mounted or on foot. They tend not to be heavily armed (usually just pistols) although they may have heavier-armed guards. They are always Veteran. They function like any other soldier, except that they can be questioned/searched, being officers.
Enemy Messengers: Enemy Messengers are mounted officers, representing those carrying orders (light cavalry) or scouting the area (quartermaster's staff). Typically they will only have pistols, but can also carry carbines (whatever is modelled on the figure). Being officers, they are Veteran, and also may be interrogated or searched.
Massed Enemy: A Massed Enemy formation represents a large concentration of French troops. They function like a terrain piece, in that they do not take actions or use initiative. When discovered, Player figures must get within 12 inches and attempt to assess the enemy troop types and numbers (using the appropriate action). They cannot be contacted by Player figures - this is considered a form of suicide! Represented by a few ranks of formed-up troops, they are the target of Player reconaissance. They are left on the table once assessed, as they will block movement - Player figures are not allowed within 12 inches other than to perform an assessment.
^ D. Terrain and Equipment
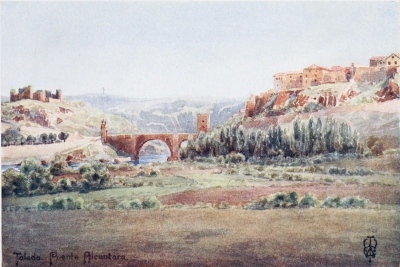
The terrain needed to play is nothing out of the ordinary, but there are a few pieces of terrain that may appear on the tabletop after the initial set-up, as a result of events and encounters. The fighting in Spain occurred in an area that is dominated by semi-arid mountains and lusher river valleys. While some areas are forested, overall the terrain will be fairly open. The Appendix contains some paintings of northern Spain, where much of the fighting took place, to give you some idea of what it looks like.
Things which may appear on the table as a result of random encounters include caves/ruins, enemy outposts, and (not really terrain, but treated as such) massed enemy concentrations. You should also have a village or two set up on the table at the start of play.
Villages are typically made up of white stucco structures with terracotta tile roofs. If you don't want to spend a fortune, these are easily constructed from small boxes. You will need to add an angled roof, windows, and doors. Tiles for roofs can be cheaply fabricated by using the insides of corrugated cardboard, cut into strips and pasted in overlapping fashion on your roof. Acrylic (non-silicone-based) caulk or spackle makes a great substance for adding some stucco texture, and it takes paint well. Alternately, such places as Paper Terrain (for example) have some reasonable "Mediterranean" printed paper buildings which would work nicely.
Caves/ruins are best represented by ruined buildings (ruins) or by the rock-formation shelters made for reptiles and fish, used to decorate aquariums and terrariums (caves). These can be purchased at most pet stores. A couple of examples of caves or ruins will suffice - they are equivalent in game terms.
Enemy outposts don't need to be fancy, and can be represented by a small square entrenched area or similar, or can be modelled as fortified buildings. These are meant to be border outposts, not major military forts (they provide hard cover as opposed to being fortifications in game terms).
Enemy concentrations are simply masses of troops. If you already have mulitply-based French Napoleonic infantry and/or cavalry, a few bases of these will work. Otherwise, a few ranks of marching French infantry would do the trick. These figures do not move or act as units in game terms - they represent the target of reconaissance.
The key with all of these terrain specials is to keep the tabletop footprint reasonably small. A few inches on a side is best.
Table space requirements for this game are nothing out of the ordinary. The larger the table space, the longer the game will take, and a table smaller than 3 or 4 feet on a side will be noticeably cramped. When setting up the table, it is a good idea to leave it fairly open, once the basics for the intended scenario are established, to leave room for the random terrain pieces which may appear. Although the game is fairly terrain intensive, it doesn't have to break the bank.
No dice are needed to play the game, as the app can be set to perform all randomization automatically. If you choose to use dice, they will be traditional six-sided ones (the control for selecting computer randomization or the use of dice is at the bottom of the game interface). Rulers and/or tape measures are needed, as for most miniatures games. Printing this document is not a bad idea, as your tablet or computer will be occupied by the game interface. You will only need to run one instance of the game interface at a time, although for a large game with multiple referees acting at the same time you might want to run one per referee.
Markers are needed for several different purposes. Rifles and artillery which have fired need to be marked. Small blobs of cotton wool work well for this. Units which have failed morale also need to be marked. Casualty figures will work, or any type of normal marker. Also needed are markers showing which units have already used their initiative during a turn. These can be counters, blobs of brown cotton wool representing dust, or whatever seems good.
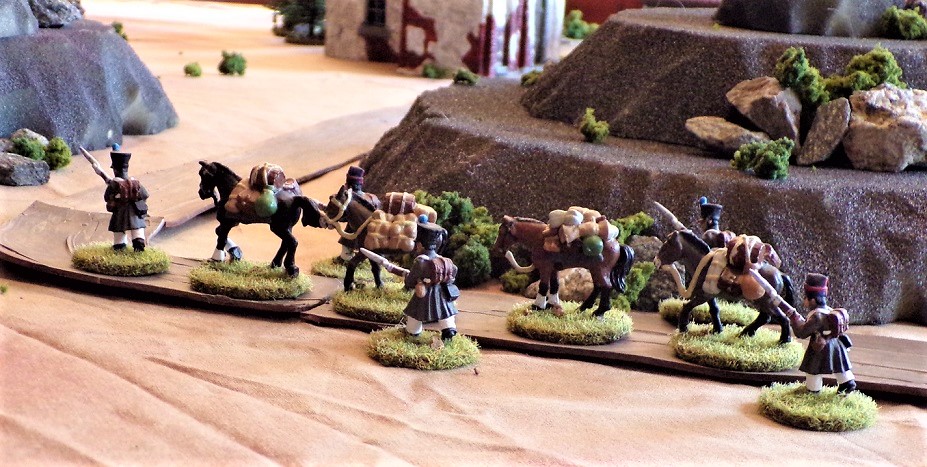
An inviting target: a lightly-defended French convoy.
^ III. Playing the Game
The game always employs a referee, whose job it is to operate the game interface and to run all the Non-Player figures in accordance with the rules. It is the referee's job to make the game fun and challenging for the players - highly competitive personalities whose only desire is to crush all opposition will tend to make poor referees. It is possible to have more than one referee if there are a large number of participants, and even to run more than one instance of the game interface at the same time. This is fine, so long as the referees can coordinate with each other. No computer networking is required to do this - only two or more devices which can run the game interface.
Players should each be given one or more Player units as their command. It is important that the referee be reasonably familiar with the rules and guidelines of the game. This is less important for players, as the referee can help keep them informed as to the relevant details during play.
This game is played in a series of repeating turns. Each turn, all of the figures on the tabletop will take one action. These are organized into a series of initiatives. The figures themselves are organized into groups (although the composition of groups is very fluid), and some actions may be made by an entire group. The sequence of play is as follows:
Press the Initiative/Event button. If it is an event, place the required models on the tabletop, or make other changes as required. If an initiative, all of the figures in one unit will take an action, individually or in groups. If the initiative is given to Non-Players and there are none currently on the table, ignore the result and click the button again. If initiative goes to Players, but all have acted while Non-Player units have yet to act, ignore and click again. After acting, units should be marked.
The figure or figures within a unit that compose a group are identified, and their action is declared. The appropriate selections are made on the game interface (Actor, Action, Target [if needed], Range [if needed], Terrain/Cover [if needed], and any relevant check boxes), and the Take Action button is clicked. Any dialogues which appear asking questions should be answered (use "Cancel" for "no"), and the results of the action will be shown in a dialogue box. This should be implemented on the tabletop (units marked, figures removed, etc.) At the end of an initiative, any unit requiring a morale check (that is, having taken any casualties during the initiative) should perform one. Tests against roundshot, cannister, and blasts should be taken as indicated by the game interface.
Repeat (1) and (2) until all figures/units on the table have taken an action.
When the figures in all units have taken actions (and any required tests or checks) the turn is over. Remove the markers for having acted, and repeat the process for the next turn.
Units: Figures are organized into units of one or more figures. Each Player unit must have an officer or NCO as a member (on-the-spot field promotions will occur when all existing officers/NCOs are killed, so that a unit always has at least one NCO). For Non-Player figures, units are the groups in which they appear first on the tabletop (or are designated at set-up). Figures within a unit must remain within 3 inches of another figure in their unit if possible at all times - if casualties or other tabletop events violate this rule, the affected figures must move to correct the situation.
Units may split into "sub-units" which are themselves just smaller units for game purposes, so long as each has an officer or NCO (no field promotions allowed for forming sub-units). Units of a similar type (infantry, cavalry, etc.) may also join to form a single unit, so long as they are within 3 inches when the merging takes place. The new merged unit will take on the quality level (Veteran, Average, Conscript, Civilian) of the majority of its figures, using the better rating when the numbers are equal. Units are split and joined as players desire, at the start of any friendly initiative used to activate any of the affected figures. Splitting and merging of units does not count as an action.
Groups: Groups are made up of figures from the same unit, after splitting or joining have been performed. The members of the group are identified, and the figures will then perform a group action (see below). Not all actions are allowed to be performed by groups. The entire group will be subject to a single interaction with the program interface (select the action and other fields as necessary, and click Take Action.) For group actions, select the best figure (that is, an officer or NCO) unless specified otherwise under Actions, below.
Note that any given figure may only act once during the turn, except in the case of charges (see below). Any given unit may only take initiative, allowing its member figures to act, once during the turn. When the initiative is taken, all figures must act. Morale checks and tests against artillery do not count as actions, but are made as required by play.
If during play there is a problem with the game interface (if it freezes), reload the page using the browser controls and continue play (it is a Web page). You must allow Javascript to run, and allow the window to show dialogue boxes. If you accidentally disable or disallow these features in your browser, reload the page (you may need to re-launch the browser or clear the memory cache).
If an action is misrepresented to the computer through user error, ignore the results, enter the correct information, and perform the action again. The fields relevant to each action are listed below.
^ IV. Guidelines for Non-Player Units
The actions of Non-Player figures can have a large influence on play. These are to a large extent determined by the referee, using the following guidelines. (Note, however - as stated above - that it is not the referee's job to win the game. Their job is to generate a fun and challenging game for the players.) Here are some guidelines for how the various Non-Player figures will behave.
Enemy infantry and cavalry: These will try to kill player troops (their highest priority). After that, they will attack guerillas (second priority). Following that, they will try to intercept interesting civilians (villagers, monks, aristocrats). Fourth priority is killing deserters, and fifth comes killing bandits.
Guerillas: These are not really non-player figures, because after they arrive on the table they can come under the control of the players. Until then they are run by the referee, with the intention of hurting the French. They will not attack innocents - only French and their allies.
Bandits: These guys will attack anything. They are, however, averse to combat against fair odds. They will generally go after enemy convoys and civilians before anything else. Exposed enemy artillery is another favorite target. They will attack deserters and other bandits as easily as they will attack anything else, if these targets appear vulnerable or are outnumbered.
Deserters: These guys are like bandits, but they are even more risk-averse, especially as they know that being caught by any formal military will result in their being hanged or shot.
Messengers: These are individual enemy hussars, quartermaster staff, and similar types of officers who are either carrying orders or scouting. Their job is not to kill the enemy, but to exit at a specific point from the tabletop, alive. (See below).
Villagers: Villagers will basically stay where they are, tending flocks or whatever it is they are doing, unless there is a threat or fighting. This they will avoid if possible. They see bandits, deserters, and the French all as evils to be avoided, moreso than British troops. Guerillas are typically avoided, being visually identical to bandits.
Monks/Priests: Monks/Priests will typically be travelling. A far table edge is selected as an exit point (see below) and they will - unless they perceive a threat (as for villagers) - try to make their way toward it.
Aristocrats: These represent Spanish nobles and (possibly) English citizens who are out of their element (and their minds?). Like monks, they will typically be travelling (Spanish), unless they decide to stay put to paint a watercolour of some lovely scenery, or to study insects or plants, or have a nice cup of tea (English). They will approach British troops to request escort, etc., when possible.
Enemy Artillery: When encountered, artillery is always travelling in a limbered configuration. If there is sufficient distance, they may choose to unlimber and fire at a threat. They may also choose to run, if their survival looks dicey.
Enemy Convoys: Despite having guards, convoys will always run from danger. Guards will attempt to allow the convoy to escape. Like other types of non-players, convoys will have a destination on the far side of the table, but will flee off any nearby (non-British) table edge if threatened.
Enemy Headquarters: These groups of officers and commanders will avoid risk at all costs. They have no interest in civilians, bandits, deserters, or guerillas except to avoid them if they are threatening in any way. They know they are a valuable target.
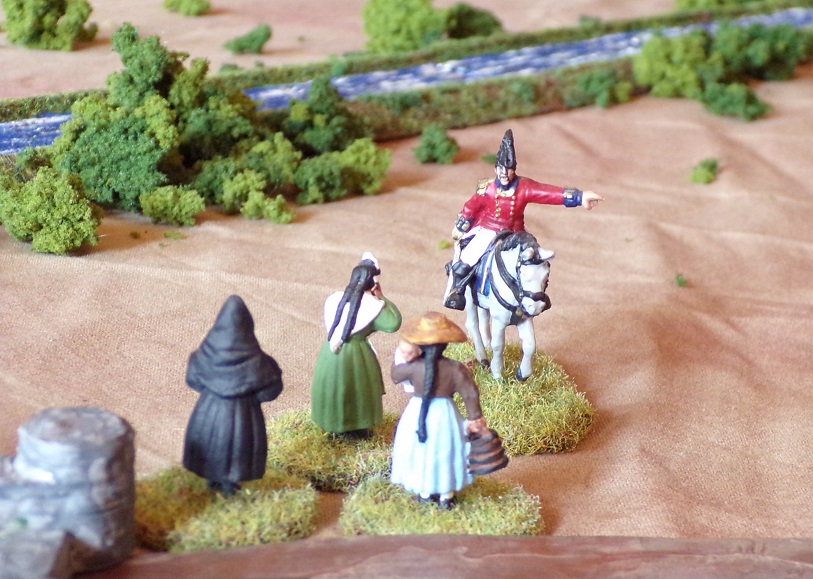
If you speak English loudly enough, even the villagers will understand.
^ V. Actions
Stand/Rally/Load: This action may be taken by individuals or groups. It involves one of three different activities: standing and doing nothing; rallying wavering troops; and reloading rifles and artillery. Note that reloading rifles and standing may be conducted as a single action by groups performing both. Pistols, carbines, and muskets do not require reloading. Rifles - when fired as muskets - also do not require reloading (see below). Light artillery must be reloaded after firing, which takes a single Load action. Field artillery requires two Load actions after firing. Loading artillery is always a group action involving the entire crew. (A minimum of two crewmen are required to load artillery.)
Move: This action may be taken by individuals or groups. If used as a group move, the slowest figure in the group is selected as the Actor (that is, Veteran, Average, Conscript, Civilian, Transport in order of fastest to slowest, with Actor Mounted checked only if all figures are mounted). The terrain through which the move will be conducted must be specified (see below), as must the Actor and Action. The Actor Mounted box must be either accurately checked or unchecked. Other fields are not used.
Charge: This action may be taken by individuals or groups. To initiate a charge, only the Actor, Action, and Terrain/Cover selections need to be made, and the Actor Mounted box checked if appropriate. Terrain is the ground over which the charging figure(s) will move. There will be a series of subsequent actions if the charge goes home (see below).
Attack: This action is performed by individuals. To make an attack, the figure must be in contact with the enemy figure which is the target of the attack. Actor, Action, Target, and Terrain/Cover (the cover of the figure being attacked) must be selected. Boxes for Actor Mounted, Target Mounted, and Attacker is Charging must be checked if appropriate.
Fire Pistol: This action is performed by individuals. Actor, Action, Target, Range, and Terrain/Cover (the cover of the target figure) must be selected. Boxes for Actor is Marksman, Actor Mounted, and Target Mounted must be checked as appropriate.
Fire Carbine: This action is performed by individuals. Actor, Action, Target, Range, and Terrain/Cover (the cover of the target figure) must be selected. Boxes for Actor is Marksman, Actor Mounted, and Target Mounted must be checked as appropriate.
Fire Musket: This action is performed by individuals. Actor, Action, Target, Range, and Terrain/Cover (the cover of the target figure) must be selected. Boxes for Actor is Marksman, Actor Mounted, and Target Mounted must be checked as appropriate.
Fire Rifle: This action is performed by individuals. Actor, Action, Target, Range, and Terrain/Cover (the cover of the target figure) must be selected. Boxes for Actor is Marksman, Actor Mounted, and Target Mounted must be checked as appropriate. When a Rifle has fired, mark it so that you know it needs to be reloaded (marker is removed using a Load action).
Fire Light Artillery: This action is taken by a group consisting of the entire crew of the artillery piece firing. The type of ammunition loaded (roundshot or cannister, or, for howitzers, shell) will determine the figures affected by fire. Specify the direction (cannister), path (roundshot) or target point of fire (shell). Only the Actor and Action fields need be selected. Other factors will be taken into account when target figures test for casualties. When Light Artillery has fired, mark it so that you know it needs to be reloaded (marker is removed using a Load action).
Fire Field Artillery: This action is taken by a group consisting of the entire crew of the artillery piece firing. The type of ammunition loaded (roundshot or cannister, or, for howitzers, shell) will determine the figures affected by fire. Specify the direction (cannister), path (roundshot) or target point of fire (shell). Only the Actor and Action fields need be selected. Other factors will be taken into account when target figures test for casualties. When Field Artillery has fired, two markers are placed on it so that you know it needs to be reloaded (one marker is removed per subsequent Load action).
Check Morale: This action is taken by units acting as a single group. It does not use their action for the initiative/turn, but is done in response to battlefield events. The quality of the unit is determined by the best figure present (Veteran [if an officer/NCO is present, or for Veteran units], Average, Conscript, or Civilian, in descending order.) Transport does not check morale - attendant figures do. (Assume a Civilian rating for drivers and non-combat personnel.)
Test vs. Blast: If within the effective radius of a shell blast (3 inches) each figure must immediately make this test. Select Actor (the figure testing) and Terrain/Cover fields, and check the Actor is Mounted box if appropriate. This action is performed by individuals as required by tabletop events. It does not use the figure's action for the initiative/turn. Transports and each of their attendant figures must perform this test if required, the attendants testing as Soldiers of the appropriate quality, and the animals/equipment as Transport.
Test vs. Roundshot: If under the path of roundshot, each figure must immediately make this test. Select Actor (the figure testing), Terrain/Cover, and Range (from the firing gun) fields, and check the Actor is Mounted box if appropriate. This action is performed by individuals as required by tabletop events. It does not use the figure's action for the initiative/turn. Transports and each of their attendant figures must perform this test if required, the attendants testing as Soldiers of the appropriate quality, and the animals/equipment as Transport.
Test vs. Cannister: If within the arc of fire of cannister (60 degrees, centered on the facing of the firing gun), each figure must immediately make this test. Select Actor (the figure testing), Terrain/Cover, and Range (from the firing gun) fields, and check the Actor is Mounted box if appropriate. This action is performed by individuals as required by tabletop events. It does not use the figure's action for the initiative/turn. Transports and each of their attendant figures must perform this test if required, the attendants testing as Soldiers of the appropriate quality, and the animals/equipment as Transport.
Parley with Villagers: This action is taken by an individual or group within 6 inches of the Villagers in question. It may only be performed once per game for any given group of Villagers, and only by Player forces. Once they have been engaged in parley, the Villagers are removed from play.
Parley with Monks/Priests: This action is taken by an individual or group within 6 inches of the Monks/Priests in question. It may only be performed once per game for any given group of Monks/Priests, and only by Player forces. Once they have been engaged in parley (or otherwise dealt with), the Monks/Priests are removed from play.
Parley with Aristocrats: This action is taken by an individual or group within 6 inches of the Aristocrats in question. It may only be performed once per game for any given group of Aristocrats, and only by Player forces. Once they have been engaged in parley (or otherwise escorted, etc.), the Aristocrats are removed from play.
Explore Village: This action is taken by an individual or group by entering a Village. It may only be performed once per game for any given Village, and only by Player forces.
Explore Cave/Ruins: This action is taken by an individual or group by entering a Cave/Ruin. It may only be performed once per game for any given Cave/Ruin, and only by Player forces.
Scout Enemy Outpost: This action is performed by individuals or groups within 12 inches of an enemy outpost with a clear line of sight. It may only be performed once per game for any given Enemy Outpost, and only by Player forces.
Interrogate/Search Enemy Officer(s): This action is performed by an individual or group in contact with the enemy officer(s) in question, after any combat has already taken place, and the officer or officers has/have been defeated (or are incapable of combat). After interrogation/search, remove the officer(s) from play (they are made prisoner or left for dead).
Assess Massed Enemy: This action is performed by individuals or groups within 12 inches of a concentration of enemy troops (Massed Enemy) and with a clear line of sight. It may only be performed successfully once per game for any given enemy concentration, and only by Player forces. Once successful, the Player will have valuable intelligence to carry back to headquarters (behind their own front lines).
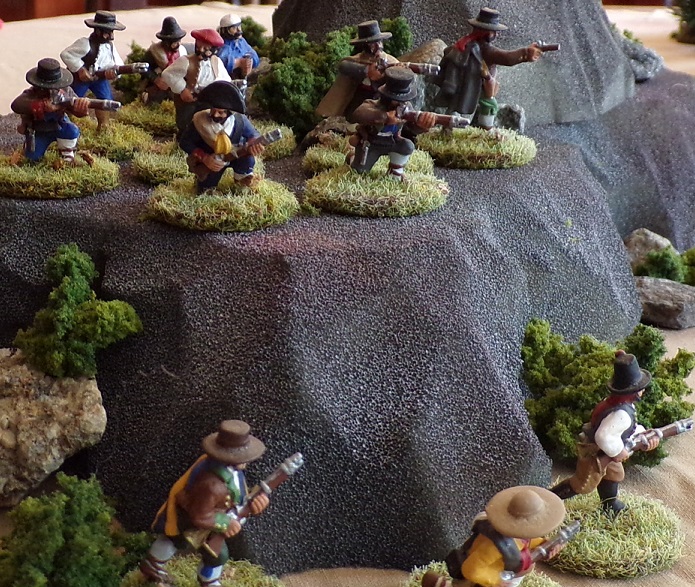
Guerillas or bandits? (All these Spanish fellows look the same!)
^ VI. Movement
Movement is performed using the movement rate supplied by the games interface. The number provided depends on the terrain through which the figure(s) are moving. In some cases, terrain will affect the movement distances as given by the games interface. If a figure spends a portion of their movement in rough terrain, but most of it in the open or on a road, the movement rate should be generated using the open/road terrain selection, then, for units on foot and for Transport, movement through the rough terrain will be reduced by half; for mounted units, it will be reduced by three quarters. The reverse is also true - if a figure moves mostly in the rough, but partly in the open or on a road, the distance will be generated using the Rough/Steep selection, but movement in the open or on the road will be doubled for foot figures and transport, and quadrupled for mounted figures.
Linear obstacles such as walls or hedges reduce overall movement by 1 inch. Some types of terrain are impassable to some troops types (an infantryman can crawl through a window - a linear obstacle - while a mounted cavalryman or a limbered artillery piece would find it impassable). Common sense should be employed when moving figures - the referee's should be employed when the player's is absent.
Figures may choose to use less than their full movement. Movement may be in any direction or combination of directions, up to the specified (and adjusted) distances. Figures may never move through other figures, or come into contact with enemy figures other than by making a Charge action or by being charged. Figures must at all times be within 3 inches of another figure in their unit, and must attempt to remain this way, moving as soon as possible to correct the situation if casualties or other events create a distance larger than 3 inches.
Some activities qualify as movement but do not involve crossing the tabletop. Mounted figures may dismount at any point as part of their movement. Dismounted figures may remount at any point during their movement. The exception to remounting and dismounting is that you may not perform this activity during a Charge action. Artillery may choose to limber or unlimber instead of using their movement for the turn. Unlimbered guns may load and fire, but cannot move other than to adjust their facing in place. Limbered guns cannot fire or load. To move or limber/unlimber with a gun is a group action involving all figures in the unit, and requires a full Move action to perform.
Generally speaking, terrain is considered to be as it is modelled on the tabletop. Any non-obvious aspects of the terrain (whether a river is fordable, for example) should be decided and agreed before play starts. Any impassable terrain should be identified, and terrain which is considered steep or rough should be identified, as should linear obstacles. If a judgement call is needed, the referee is the final arbiter of such matters.
^ VII. Fire
Firing is divided into two categories: firing personal weapons (pistols, carbines, muskets, and rifles) and firing artillery (light and field guns). Personal weapons may only be fired by figures which have an unobstructed line of sight to the target figure, judged by examining the tabletop. If an unobstructed line exists between the base of the firing figure and the base of the target figure, fire is possible. Note that you may not fire through gaps between figures of less than 1/2 inch. Figures in combat contact with friendly figures are not legitimate targets.
Some types of obstruction (foliage) do not stop fire, but provide cover. When firing at artillery and transport, the crew/drivers are the only legitimate targets - the gun, wagon, etc. is not. A target may be seen up to 2 inches into or through foliage, unless it is very dense (hedges). A target which is partially visible or only visible through foliage or other terrain insufficient to stop a bullet is judged to be in soft cover. A figure partially visible behind stronger terrain (walls, rocks) is judged to be in hard cover. A figure behind fortifications is judged to be in fortifications for purposes of fire. Note that some cover (such as hasty trenches) provides hard cover but does not qualify as fortification - fortifications are prepared military works.
Different weapons have different ranges. If a figure fires and gets an "out of range" result, the action has still been taken.
Rifles are a special category of personal firearms. They can be fired in one of two ways - as rifles, with a tightly-fitted load which has increased range and accuracy, or as muskets, with a loosely-fitted load which does not benefit from the rifling in the weapon's barrel. British riflemen carried both types of ammunition. To fire a rifle as a rifle (using the "Fire Rifle" Action), it must be loaded. This requires a separate action. (All figures with rifles begin the game with rifle ammunition loaded.) In order to fire a rifle as a musket (using the "Fire Musket" Action), no loading is required. Because the smaller rounds were much easier to load, a rifleman may fire his (loaded) weapon as a rifle, and then fire it as a musket in the following action.
Artillery fire requires that the unit has unlimbered the gun. There are three types of ammunition which artillery may fire. Howitzers fire shell or cannister. Other types of artillery fire either roundshot or cannister. When a gun is loaded, the type of ammunition loaded must be specified, or it is assumed to be roundshot (for howitzers, shell).
To fire cannister or roundshot, the facing of the gun may be adjusted up to 30 degrees left or right. Once done, for roundshot a line is drawn from the barrel of the gun and in line with it out to the maximum range of the gun (48 inches for light artillery and 72 inches for field artillery). Any base crossed by this line - friend or foe - must test versus roundshot, to determine if they are made a casualty. For cannister, a cone-shaped arc of fire covering 60 degrees is placed, centered on the barrel of the gun and extending outward 24 inches for light guns and 36 for field guns. Any figure - friend or foe - within this arc must test versus cannister to see if they become a casualty.
Firing shell from a howitzer involves selecting a point where the shell is intended to explode, within an arc 30 degrees to either side of the gun's facing. The point of detonation may be adjusted by the game interface. Any figure - friend or foe - within the blast radius of the shell must test versus blast to see if they become a casualty. When firing shell, the range must be specified accurately on the games interface - when firing roundshot and cannister, range is only important when figures are testing against the effects of munitions.
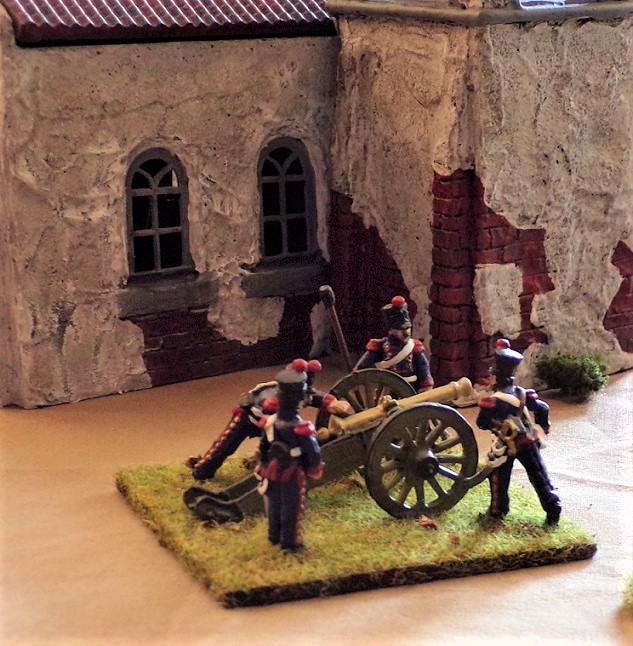
French horse artillery prepare to fire.
^ VIII. Charges and Attacks
Charges involve not only a type of movement, but also an attack, and potentially involve a reaction on the part of the figure who is the target of the charge. Both Charge actions and subsequent reactions may be made by groups if appropriate - the reacting group may consist only of figures against whom charges have been declared. You may only charge an enemy figure which you can see - there must be an unobstructed line of sight as for firing. Charges are conducted as a series of actions, which will consume the actions of both the charging and charged figure for the turn unless the charge fails to reach its target (in which case only the charging figure's action is used).
The first thing is to move the charging figure the distance provided by the game interface. This is governed by all normal movement rules. If the charging figure contacts its target, the target figure may be allowed a response. This requires that it has not yet acted during the turn. A response action (reaction) may involve a Move action (to get away from the charging figure or into cover, or to advance toward the charging figure), or the fire of a personal weapon. Such fire is made using a range bracket determined by the quality of the firer: for Veterans, use the shortest range bracket; for Average troops, the range is half the distance from where the charging figures starts their move; for Conscripts and Civilians, it is the distance to where the charging figure started their move. If a reaction Move takes the charged figure out of contact with the charging figure, the charging figure must use any left-over movement from their earlier charge move to attempt to re-establish contact with the target figure.
If the figures are in combat at this point, the charging figure will make an Attack action on the target figure. If the target figure survives, it will make an Attack action on the charging figure.
It should be noted that Transport and Artillery, when acting as the targets for charges, involve charges made against the crew and drivers, rather than the artillery piece or the transport wagon, animals, etc. Thus, reaction moves will involve only these figures: guns, wagons, draught animals, etc. will be abandoned.
^ IX. Morale
The morale system reflects the onset of panic in units which are taking casualties. The morale rules are simple: after any initiative during which any unit takes one or more casualties, it must perform a morale check. Morale checks are performed after the acting unit has made all actions for the initiative, and the results will affect every figure in the unit checking morale. The morale check is not a regular action, and does not count as the unit's action for the turn. All units begin play with a Solid status. If they fail a morale check, their status goes to Wavering. A Wavering unit is only allowed to make one of two actions: it may Move, or it may Rally. If a Rally is successful, the unit's status goes back to Solid. If it fails, the unit is removed from play. A Rally does count as the unit's action for the turn.
In checking morale and rallying, units will be evaluated as to strength ("Are half or more of the figures in the unit gone?"). This is determined against the total original number of figures in the unit, unless it has split. If the unit has split out as a subunit, from a larger original unit, the strength of the (sub)unit checking morale is that immediately after the most recent split. The quality of the unit checking morale (the Actor) is determined by the best quality figure in the unit. Transport never checks morale - drivers, guards, and attendants check as soldiers of the appropriate quality, or as Civilians if no quality has been indicated. The transport itself is not affected by the results of morale failure, but is left standing on the table.
A band of deserters has their life of leisure rudely interrupted...
^ X. Scenarios, Tabletop Events, and Deployments
^ A. Scenarios
The Other Side of the Hill permits but does not require the design of specific scenarios. The "generic" scenario is a mission to scout the tabletop, and is covered by the victory conditions described in the Winning and Losing section below. However, in addition to these generic criteria, players may wish to have scenario-specific mission goals, and their attendant forces and tabletop installations.
In all scenarios, there is a small portion of the tabletop specified as "friendly lines." This area can be modelled and situated somewhere on the tabletop, or can be (the default) simply indicated as being one table edge, beyond which is friendly territory. Unless specified otherwise by scenario, Player figures start the game behind friendly lines, and must return to them to win the game.
Scenario design can be quite intricate, or can involve the institution of some simple additional mission goals. Examples of some typical scenarios are provided here. It should be noted that - especially for small Player forces - survival on the tabletop can be quite difficult. The normal levels of enemy forces should be taken into account when scenarios are designed, so as not to require the impossible of players, and to achieve a good balance of forces.
Scenario Example 1: The Hunt for Etienne Ducos
Here is an example of a fairly straightforward scenario. The near short side of the table is designated as friendly lines, and a village is placed near the far end of the table. The referee will know (although the players do not) that the village contains a force of 24 Veteran enemy infantry, with an officer and two NCOs. Among them is an important enemy agent (pistol-armed officer) named Etienne Ducos (Pierre's brother), who dresses as a civilian. The Player forces consist of two 20-man units, one of Rifles and the other of Light Infantry, both with an officer and an NCO, along with a patrol of 12 Light Dragoons with an officer. The force has a mounted overall commander. The mission objective is to kill or capture Etienne Ducos. The French may decide to venture forth from the village, or may wait until the British search the village, at which point the pre-determined garrison is substituted for whatever result the game interface produces. Ducos, as an officer, may split off with or without soldiers and move on his own, including off any non-friendly table edge, in an attempt to escape. At the start of the game, the Players are only told that there is an enemy spy reported in the village, and that he must be killed or captured. The scenario-specified French figures (Ducos and the garrison) appear on the table if they move or act before the Player figures conduct a search of the village where they are set up. Note that Ducos would prefer not to be chased off the table, and will not flee unless seriously threatened (like his brother, he is an arrogant SOB!).
Winning this scenario according to the mission goal will involve a high degree of skill and luck. Not only is there a significant enemy force which will probably need to be defeated, but Ducos can easily escape unless the village is surrounded. Treat success in terms of this mission criteria as in addition to other generic victory criteria, and as constituting an additional way in which the highest level of victory can be achieved.
Scenario Example 2: The Marquise of Alorna
The Marquise of Alorna* is a Portugese noblewoman who, although not openly siding with the French, has several relatives who do. Her brother is the commander of the Portugese Legion in the French army, and her daughter is Junot's mistress. Consequently, on her return from England she was welcomed by the French powers controlling Spain, to visit with her relations. Now, she is returning to Portugal, with the official sanction of the British military. Socially and politically, she is a high-visibility individual, and anything bad happening to her at the hands of the British will be seen as a serious problem at Horse Guards.
Naturally, she is of great interest to intelligence officers within the British military, especially as she may have some anti-Napoleonic sentiments (her feelings are not known, but she has sent her son to stay with the Portugese royal court in Brazil). To protect her from "accidental" disappearance while en route, two carriages have set out from the French frontier, travelling by different routes. Each is accompanied by an escort of 12 Average French cavalry lead by an officer. One of them holds the real Marquise, and the other does not, but without looking inside there is no telling which is which. One end of the table is designated as friendly lines, and represents the border where the Marquise will leave her French guards and come under the official protection of the Portugese military, where she will not be available to British intelligence for questioning. The players do not know which carriage holds the real Marquise, or even that there are two carriages, but the referee does. The players know only that the Marquise is in an escorted carriage. Both will enter at the far end of the table from the British lines, moving at mounted Transport speeds, timed however the referee sees fit.
Player forces have the mission of intercepting the Marquise and defeating her escort, bringing her back to friendly lines with a false tale of how they rescued her from bandits/deserters. There, she will be interviewed by the intelligence officers before being handed over to the Portugese military. Suspecting such a plan, there is a third French force of 15 Veteran infantry, with NCO and officer, who will be hiding in the area the carriages are to traverse. These troops set up in the center of the table, but their existence and location is not revealed to players until they make an action or Player forces come within 12 inches of them.
Player forces consist of four 15-figure infantry units, two of Riflemen and two of Light Infantry. All are Veteran, lead by an officer and an NCO. The overall force is commanded by another officer. Player forces set out from anywhere behind friendly lines. If anything bad should happen to the Marquise (shot by bandits, for example) it is a catastrophic loss. The French will not intentionally harm her unless she has already been taken by the British. The goal of abducting the Marquise and bringing her in for questioning overrides any other victory criteria. A failure to do this successfully is considered a loss, only the degree of which may be ameiliorated by other factors.
* Although bearing no specific resemblance to the character in our scenario, the Marquise of Alorna was an historical figure, whose brother commanded the Portugese Legion until 1810 and whose daughter was, in fact, Junot's official mistress. She had strong ties to the Portugese Royal Court, and while in London stayed at the house of the Portugese ambassador to Britain.
These scenarios will give you some idea of how they can be constructed, and overlaid on the existing "generic" scenario structure. Ideas for scenarios are easy to come by - a little bit of digging on Wikipedia is sure to produce some inspiration.
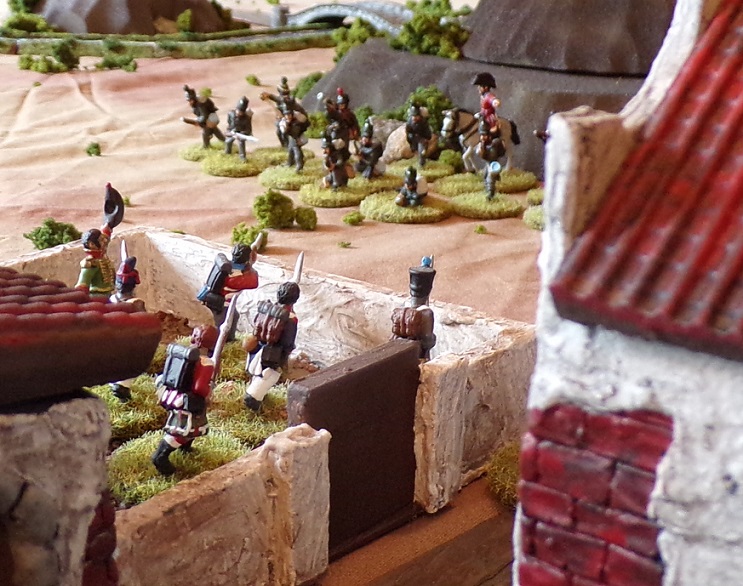
French dragoons spring their trap!
^ B. Tabletop Events and Deployments
Unless otherwise specified by scenario, Player forces will start and (hopefully) end the game behind friendly lines, whether that is a portion of the tabletop or a table edge. Note that, once on-table, any exit off a table edge means that the figures making the move are removed from play. During the course of play, many different figures will appear on the tabletop. This section provides information on how to implement such tabletop events, which are generated by the game interface.
Placing enemy troops and other Non-Player figures is done as announced by the program interface in a Player Event. The event will specify how many (if relevant) and what type of figures are to be placed on the table. For Villagers, Monks/Priests, and Aristocrats the number is not important - two or three figures will suffice.
The location of the figures' deployment requires some basic guidelines. The program will specify a location in relation to the Player's current position. The current position is to be understood as referring not a to a specific Player unit, but to the Player forces as a whole. A notional circle (not actually a circle, but a perimeter ring) is drawn around all Player units, and their general facing (front, back, left, right) is determined. The distance provided by the Player Event will be from the closest point on that notional circle going in the indicated direction from its center (ie, measurement of "18 inches to the left front" starts on the left front point of the circle).
Sometimes, the indicated location will be off the table edge. In such cases, the deployment should be on the edge of the table in the indicated direction, with any portion of the measurement occurring off-table transferred instead to a movement along the table edge away from friendly lines. Thus, if I have a deployment indicated which is 18 inches away from my Player's current position to the left, and this places it 6 inches off the table, I will move it towards the table edge opposite that representing the friendly front lines, along the left table edge, a distance of 6 inches. The deployment will occur on the edge of the table at that location.
Any deployment occurring behind friendly lines is ignored. Deployment inside of friendly lines is not permitted. In those cases where the entire Player force does not have a clear front, rear, left and right, the direction toward friendly lines will be used as the rear.
Figures should be placed within 3 inches of each other (and grouped more tightly, typically) to make a valid unit formation. The specified point of appearance on the tabletop should be interpreted as a center point for the unit. Deployments will be forced to take tabletop terrain into account. It is up to the referee to determine exactly what the deployment will look like, but it is not unreasonable for Non-Player units to deploy according to the terrain. Units will not, for example, appear in the middle of a river at a non-fordable point.
Units will also not appear inside of other units, but will instead be placed adjacent to them. There is no minimum distance to other Non-Player units - the minimum distance towards Player units will be the distance indicated in the Player Event (approximately, to account for unit deployment). Once deployed, a Non-Player unit must wait for a Non-Player initiative to act. Units will not appear on the tabletop and immediately make an action unless this is indicated by the program interface.
Some types of Non-Player units will be travelling (see Guidelines for Non-Player Units, above). For these, a destination should be determined by the referee using the following system. Choose the non-friendly-lines table edge which is furthest from the point of deployment for the figure(s). Select the logical destination (for example, where a road exits the table on that edge) furthest from the deployed figures. Once the destination is determined, the referee should mentally select the most logical route, and the figures should follow that unless tabletop events would indicate a change. If there is a village (not for Messengers) or, for Enemy Convoys, Messengers, and Artillery, an enemy outpost within 12 inches of the logical exit point, it may be substituted for a table-edge exit as a destination. When the destination is reached, remove the figures from play. In the case of Enemy Convoys and Artillery, if these are travelling they will not be removed from play if their chosen destination is a village or enemy outpost. Instead, they will deploy for action (Artillery will unlimber, Convoy guards will man the perimeter, etc.).
The placement of Guerillas - although not, strictly speaking, Non-Player figures - is conducted in the same fashion as for Non-Player figures.
There are three types of terrain which will also require random placement on the tabletop: caves/ruins, enemy outposts, and massed enemy formations. Their placement is the same as that for Non-Player figures. When the location of any of these is indicated by the game interface, even if only by information gathered from Villagers, Monks/Priests, Aristocrats, or enemy officers, the appropriate terrain piece should be immediately placed on the table, along with their occupants if known. The inhabitants/nature of the terrain may not be known until it is searched, explored, or assessed by Player forces. At this point, any needed changes/additions should be made to agree with the program interface (ie, an enemy outpost might be an impromptu fortified building, or it might be a full-blown enemy fortification. This is not known until it is scouted.). The same is true of villages, although these are on the table at set-up, and do not appear as the result of Player Events. Their inhabitants are not known until they are explored by Player figures.
Deployments should be made by the referee using a degree of common sense and judgement. Adjustments to the location and distance of a deployment to reflect common sense are allowed. Whining about this on the Players' part is grounds for a determination of cowardice (see Winning and Losing, below). It is even allowed for referees to simply ignore Player Events if these would materially undermine the game (for example, if Player units are already getting massacred).
^ XI. Winning and Losing
Players will win or lose the game, based on the following criteria, unless otherwise established by scenario. It should be noted that, in multi-player games, a decision should be made as to whether the entire British force will win or lose as a whole, or whether this will be determined at the level of each player's command.
In order to win, at least one surviving Player figure must exit the table into (or enter, if represented on the tabletop) their own lines. This does not always indicate a win (cowardice in the face of the enemy is a hanging offense, as indicated by making a short move into enemy territory and then beating a hasty retreat, etc.) The referee may identify and attend to the execution of cowards as appropriate. Note that only the commanding officer or NCO is typically executed in such cases.
The degrees of victory are several: in some sense, you are just doing your job as a scout, and winning consists in performing it acceptably. Thus, it is possible (although very unlikely) that you can enter enemy territory and spend the entire game traversing it without encountering the enemy. So long as a good-faith effort is made to scout the tabletop (and any additional mission objectives are met) this constitutes a victory, albeit of the lowest order. Note that in all cases, mission objectives assigned by scenario (if any) should be factored into the degree of win or loss.
A higher order of winning consists of meeting the enemy and making it home alive. Disengagement with enemy forces is permitted if they are overwhelming in their strength. Equal numbers of the enemy do not constitue an overwhelming threat - try two-to-one odds as a starting point. Disengagement from inferior enemy forces may constitute cowardice (see above). Better by far is vanquishing the enemy, preferably in large numbers and as part of thoroughly scouting the tabletop. Destroying enemy convoys and especially artillery is noteworthy. The defeat and subsequent questioning/searching of enemy officers even moreso. A single victory point is awarded for meeting the enemy, engaging in combat, and returning with at least some portion of your force to friendly lines. This point is only awarded once per game (per player), so multiple engagements do not increase the number of points.
A third level of victory is achieved by locating enemy assets. These do not include groups of enemy skirmishers, but do include enemy outposts, fortifications, and ammunition dumps/magazines, and even the presence of Massed Enemy without an accurate assessment of strength. Also at this level of victory is the successful escorting of aristocrats back to friendly lines. (Locating and assessing the strength of Massed Enemy is a higher order of victory.) Included here is the capture of worthwhile (although not critical) intelligence, typically including that captured from searching/interrogating enemy officers (unencoded), but also including reporting the current French ciphers, or encoded enemy orders/communications without the ciphers. This level of success brings two victory points for each incident at this level.
The fourth category of victory is the reporting of the location of Massed Enemy which has been successfully assessed as to strength and troop types. Also at this level of victory is the escorting of an Exploring Officer back to friendly lines alive. This category further includes the return to friendly lines with significant treasure, whether captured from the enemy or looted from a cave or ruin. This success criteria is worth 3 victory points for each instance.
The highest level of victory is either the destruction/capture of an enemy magazine or fortification (along with the defeat of any defenders) or return to friendly lines with both the current encoded strategic plans of the enemy and the cipher needed to decode them. Note that there is a distinction between enemy outposts (hard cover) and true fortifications. While generally worth four victory points, if the enemy outpost is fortified, 5 points are awarded.
All of the victory conditions mentioned here can be achieved in the absence of additional mission objectives, and may (depending on your referee's judgment) even override such scenario-assigned objectives. They are part of the events and encounters which are randomly generated by the program interface. Typically, an objective (such as scouting a village) will be worth a single victory point per objective if on the near half of the table, and twice that if on the far side.
As negatives, each destroyed player unit (including separate independent officers, if used) costs 2 victory points. Any unit making it back to friendly lines with half or greater losses costs a single victory point. If no friendly units return to friendly lines, that is an automatic and categorical loss (and everbody assumes you have deserted!)
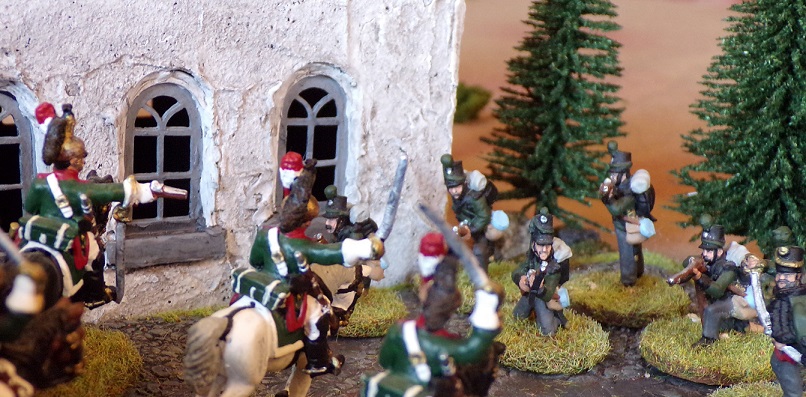
Earning the King's shilling - riflemen encounter a tough opponent.
^ XII. Miniatures Needed for Play
One of the great things about skirmish games is the way in which they use non-typical figures (such as civilians of different types, command figures, etc.). The Peninsular War is a very colorful period, and the choice of different figures is amazing. To start playing, a minimum of about 70 to 80 figures is required, including one artillery piece and fewer than a dozen mounted figures. (If you want to make your table look really good, you can easily field several hundred figures. This may be a more appealing option for those gamers who already have Napoleonic collections.)
As a consequence of the random appearance of different figure types during game play, it is difficult to specify an exact number of figures needed for the game. This section provides some guidelines regarding the expected number of figures required.
Player Figures: This is a known quantity, determined by the players. Appropriate numbers of Player figures of the desired types need to be available, typically 8 to 24 figures for infantry (with an officer and NCO) per unit. Cavalry units will be of between 6 and 12 figures, again with an officer and/or NCO. Artillery should have a crew of 4 to 6 figures and a gun (a limber and a driver or two are also nice if available). The game can be played with one or more player units, with 3 or 4 being ideal, and more than six becoming unwieldy. It is normal (but not required) to have a mounted commanding officer figure (or, if desired, one on foot for light infantry forces and riflemen).
French Infantry: There are three quality grades of infantry - conscript, average, and veteran. It is nice to represent these with separate, visually distinct figures, but not absolutely required. At a bare minimum, 24 figures will be needed, with some officers and NCOs among them (1 or 2 per 12 figures). It is much better to have at least 36 infantry figures to represent the French. Quality can be indicated by using a marker if needed and sufficient different types of French figures are not available. Having a few additional figures in greatcoats to use as convoy guards, headquarters guards, deserters, etc. is also a good idea.
French Cavalry: Cavalry is not very common in this game. A minimum of 6 figures is required, and having 9 or 12 on hand is better. At least one should be an officer/NCO.
French Artillery: Having a single gun with 4 crewmen is the required minimum. Having a limber with a driver or two is nice - having up to three guns is ideal. The game does not require that artillery be horse or foot artillery, nor does it specify the type of gun. Because gun crews typically stay by their pieces, having multiple mounts including both gun and crew is not a problem.
Guerillas: Guerilla units will not typically be of more than about 12 men. This is a reasonable minimum of figures, but given that Guerilla figures can double as Bandits, twice this number is probably a better idea, covering both categories. Guerillas can be mounted or on foot, and units may contain armed Monks/Priests (although Bandit units would probably not).
Bandits: As for Guerillas, above.
Deserters: Deserters are simply a random selection of troops which could have been in the Peninsula. A mix of French, British, and Portugese troops is good, with perhaps a less-formal style of dress (greatcoats, forage caps or bare heads, "ragged" troops, etc.). A minimum of 12 is good, and some (the French) might do double-duty as convoy guards, etc.
Villagers: At a minimum, 2 or 3 Villagers will suffice. No more than 6 should ever be required.
Monks/Priests: At a minimum, 2 or 3 will suffice. Six is a good number. Be aware, however, that armed Monks/Priests may be needed, and that these can do double-duty as Guerillas. Six of these are very useful, if you choose to make the distinction between armed and unarmed Monks/Priests on the tabletop.
Aristocrats: Not many of these are needed. Two or 3 will suffice, but it is nice to have a mounted one to use as an Exploring Officer. Note that Spanish nobles could be very old-fashioned in terms of their dress, so existing figures from earlier periods might be useful.
Convoys: At a minimum, a couple of pack horses or pack mules will suffice. Twice this number is good, and wagons are ideal. No more than 2 or 3 convoys should ever be necessary. Convoys are attended by a few guards, so having 6 French infantry for this role (and to do duty also as infantry and deserters) is a good idea.
Enemy Officers: Having two or three mounted French officers is a good idea, although foot officers can also be used. These serve not only as Messengers, but also as figures in enemy Headquarters units.
Headquarters: French headquarters will be represented by up to 6 figures, which will include at least one officer, along with staff and guards. Command figures such as musicians and standard-bearers could also be used.
Massed Enemy: These are not really figures for play, but function more as a terrain piece. If you have existing multiple-mount Napoleonic French infantry or cavalry, these are perfect. You could also simply use a marker of some kind. Ideally, these concentrations of troops would consist of 12 to 24 infantry, along with attendant officers and command figures, etc. Think of these as a small diorama about 4 to 6 inches on a side, representing an army on the march.
Note that some figures in your existing collections may be very useful. For Guerillas, Bandits, and Deserters you may have figures such as pirates which could be used. Civilians tend to be fairly generic as well, and Monks/Priests very much so.
There is an incredible wealth of figures available for this period, but for some of the harder-to-find pieces I include some pointers to sometimes non-obvious sources. My favorite armed monks are available from Askari Miniatures - it is a one-off set sold under their Miscellaneous category, as they typically do not produce Napoleonic figures. Another great source for these is the Perrys' Carlist War line, which also has some good Spanish villagers (from the 1830s, but they work well and are distinctly Spanish.) For guerillas/bandits, my favorite source is Front Rank, which also makes a line of very useful Napoleonic civilians. (Hint: when ordering these in the U.S., compare prices with shipping between the U.S. supplier, Triangle Miniatures, and Front Rank in England. Depending on the exchange rate, it is sometimes cheaper to get them from the UK. I have had really excellent service from both sources.) Front Rank also makes good Spanish and Portugese troops, for that unit of cazadores or the odd deserter figure. For everything else, we are basically embarrassed by riches!
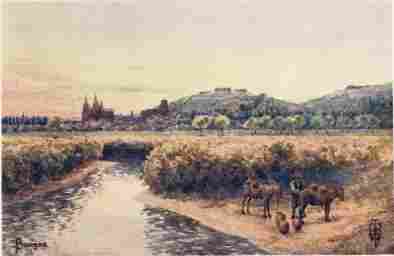
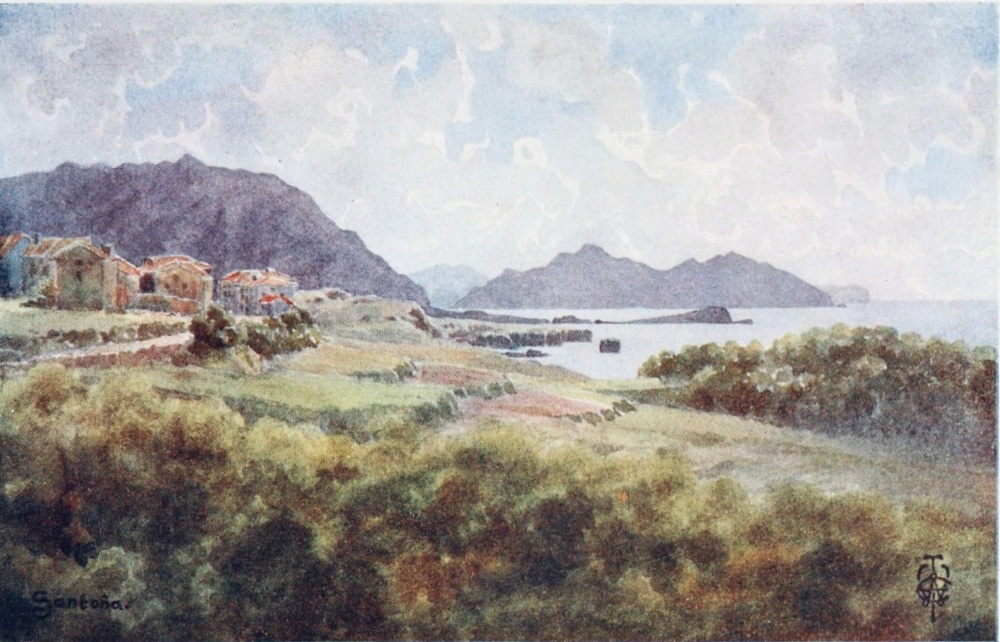
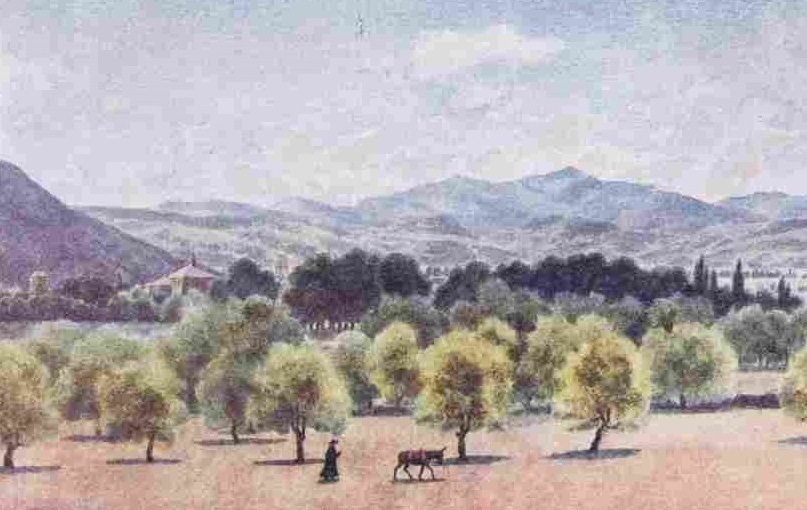
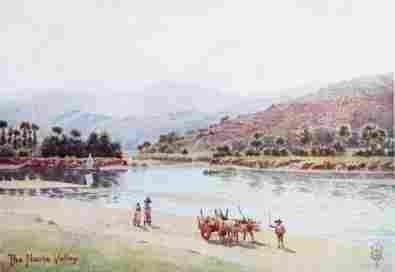
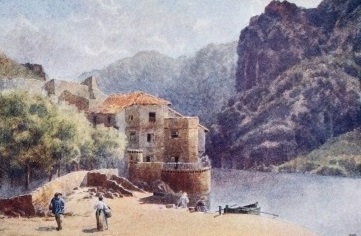
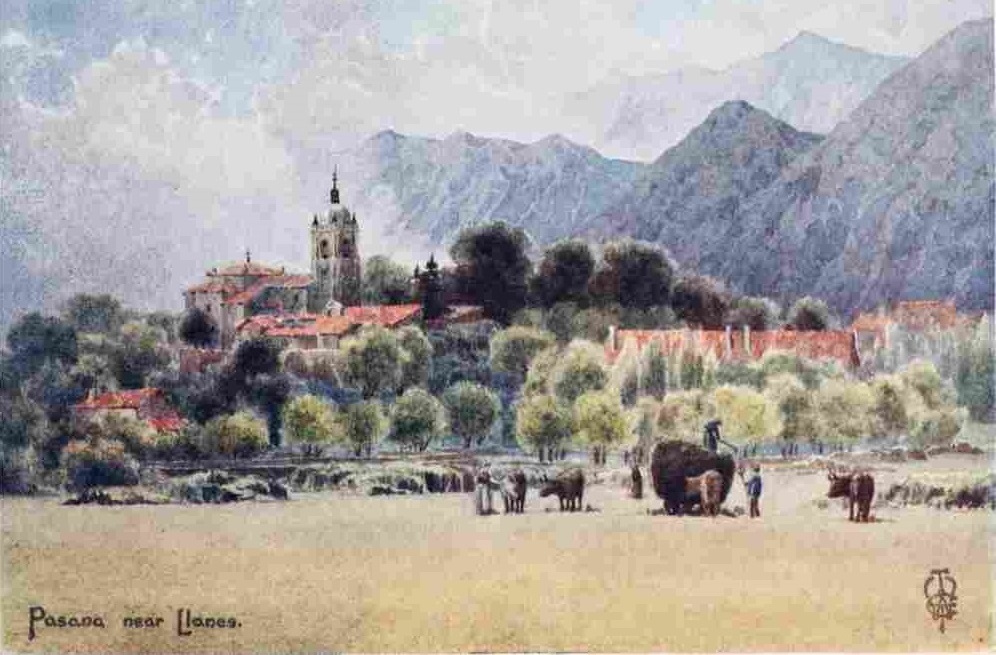
^ Appendix: The Spanish Landscape
For those collecting or selecting terrain for the game, here are some paintings by Edgar T.A. Wigram which will give you a feel for the countryside in which the war occurred. Although dating from the early 20th Century (published 1906), the geography won't have changed too drastically. More can be seen at the website of his book Northern Spain. Note that these are mostly of the lusher areas around rivers - mountainous areas would be rockier, and lack some of the vegetation. (Of course, you can also just go and watch some Sharpe's videos, but you might get distracted!)