1848! Rules and Guidelines
A Miniatures Wargame of
19th Century Revolution
By Arofan Gregory, copyright (c) 2018. All rights reserved.
By Arofan Gregory, copyright (c) 2018. All rights reserved.
"We vow that we will be slaves no longer!"
- Sándor Petofi, from the Hungarian Nemzeti dal (National Song)
1848! is a game depicting the revolutionary uprisings which occurred throughout Europe during that epochal year and the following one. While most were defeated by harsh counter-revolutions, if one must pick a single year to mark the end of the era of monarchy, 1848 is it. There were uprisings throughout Europe: Germany, Poland, Italy, France, the Netherlands, Denmark, Austria, Hungary, Wallachia, Moldavia, Romania - in all, 50 different countries were affected to one extent or another.
While this has always been a period which fascinates history buffs, it has never been a major period of interest for wargamers. Related periods such as the Risorgimento have become popular, featuring large-scale military conflict between nation-states as they do, but the actual revolutions of 1848 - with some exceptions, such as Hungary and Italy - do not lend themselves well to traditional types of miniatures wargames. To overcome this, 1848! provides a non-traditional wargame, allowing miniatures enthusiasts to simulate these smaller-scale revolutionary struggles against the oppressive monarchies of Europe.
The game is unusual in some important respects. First, it is a non-competitive game - players all take the side of the revolutionaries, fighting against the government forces, which are run by a referee operating a games interface on a personal or tablet computer. Players may win or lose, but not against each other. Second, it is a computer-assisted game, where all movement, combat, morale, and other tabletop functions rely on the games interface for resolution.
In other respects, it is a fairly typical type of miniatures skirmish game, designed for individually based 25mm/28mm figures (other scales may be used by adjusting all distances - use centimeters instead of inches for 15mm, etc). An effort has been made to keep the number of figures required fairly small, relative to miniatures wargames depicting field battles. Combat is similar to that seen in the Napoleonic Wars and the American Civil War: the dominant weapons of the time were percussion muskets, in process of being replaced by their rifled counterparts. The ad-hoc nature of many of the revolutionary forces meant that the government forces generally enjoyed a technological advantage, despite the fact that they were often not using the most advanced equipment of the day.
Players are placed in the role of revolutionary leaders, making their way through the countryside, towns, and cities, rallying their fellow citizens to their cause, and hindering the forces of government oppression. The goal is typically to capture some center of local government - this is left up to the scenario designer - but also involves interaction with reactionary mobs, aristocrats, groups of civilians, and others. Enemy strongpoints may be encountered, and the location of political prisoners, government treasuries and magazines/armories, papers, and other valuable assets may be discovered and siezed. Enemy forces will be faced, but it is sometimes possible to incite them to mutiny.
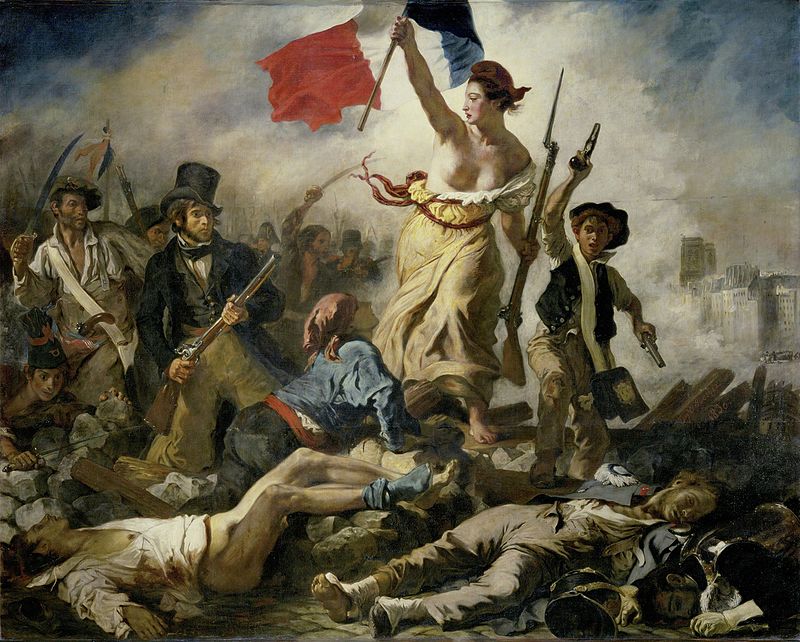
This game is based mainly on the events of 1848-1849, attempting to provide a sufficiently generic mechanism to allow for the representation of such conflicts in various different national or regional settings. It would also be appropriate for some of the earlier revolutionary efforts, notably those in France (note that Delacroix's "Liberty Leading the People," above, depicts the French uprising of 1830). Here, we see risings in 1830 and 1832 against the Bourbons and the House of Orleans, and also the last of the pro-Monarchist Chouan/Vendean uprisings in 1832. Other earlier uprisings include those in Sicily and other parts of Italy from 1820 onward, and there was significant unrest or revolution in Poland, Hungary, Prague, and elsewhere in the 1830s and 1840s. The decision is one of selecting the conflict you wish to depict, as the uniforms change but the basic capabilities and activities of the proponents remain more-or-less the same.
While our mental image of these revolutions is of armed citizens defending barricades against government troops, often the revolutionary forces were based on a core of veteran soldiers, from existing military establishments or outside, who had been trained or fought before in uprisings elsewhere. Garibaldi gives us perhaps the best example of this - forced out of Europe in an early uprising in Piedmont, he became an experienced soldier who had fought in South America long before he began taking part in various Italian actions (notably in Milan in 1848 and Rome in 1849). And often, the revolutionary forces were not on the defensive, but proactively taking their cause to the people, in both urban and rural settings. Sometimes such efforts failed, but sometimes they were successful. In Baden, for example, the Hecker Uprising never convinced more than a few hundreds of men to join, despite the defection of some local militias to the rebels' cause. In the nearby Palatinate, an army of 30,000 was assembled.
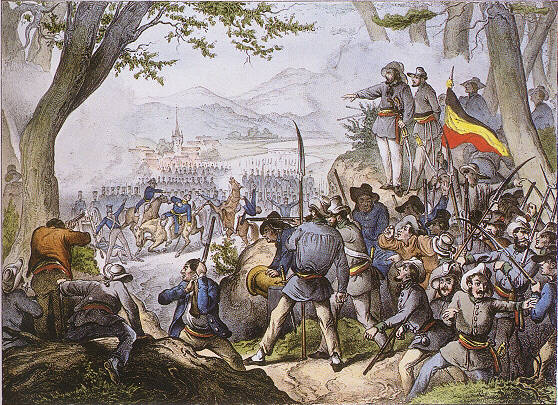
Hecker's forces at the Battle of Kandern in Baden, Germany
What makes the period fascinating is the courage of those standing up to centuries of rule by kings and nobles who rejected the notions of individual liberty and equality, of democracy and fair representation, fighting against overwhelming odds to assert the truth of ideas that today we feel are self-evident. To provide some perspective, the more radical strains of revolution were Communist or Anarchist, but these were a minority - many revolutionaries were Republicans and Democrats, and some were constitutional Monarchists (the establishment of a constitution being a very common revolutionary demand in 1848). Together, they opposed the more conservative governments of the post-Napoleonic world. The debt we owe to those who fought in the revolutions of 1848 is a tremendous one. In hindsight, their efforts were clearly fundamental to our modern way of life.
They also form a fun and colorful period for modeling and wargaming. I hope you enjoy 1848! in the intended spirit, as a way to explore this fascinating part of our history. Down with Absolutism!
The revolutions and uprisings of 1848 began in Sicily, where there had been a long history of civil unrest and armed rebellion, dating back more than 10 years. Far more prominent in the public eye was the February Revolution in France, where the unpopular King Louis Phillipe was ousted, to be replaced by Louis Napoleon Bonaparte, first as the elected president of the Second Republic and three years later as the self-appointed head of the Second Empire (a family tradition, it seems...). France, too, had a long history of civil unrest: the Revolution of 1789, the July Revolution of 1830, and the June Uprising of 1832 were all major events, and there were several other episodes of rebellion and civil disturbance outside of Paris.
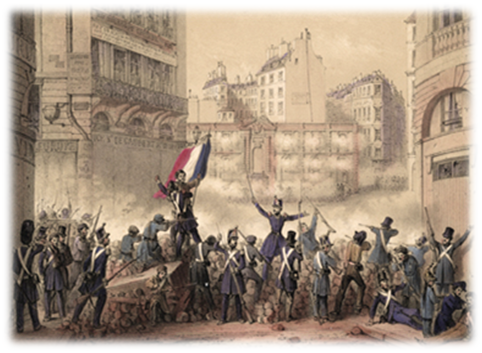
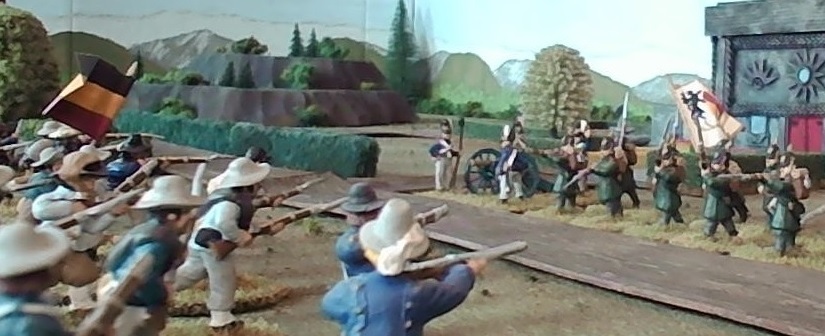
Fighting at the barricades in Paris in 1848
The February Revolution (they get called "uprisings" only if they don't succeed in causing a change of leadership, apparently) sparked a wave of revolution throughout Europe. Italy had long been the scene of revolts against the Bourbons in the south, the Pope in central Italy, and the various rulers supported by the Austro-Hungarian Empire in the north. In 1848 war broke out. In partitioned Poland (divided between Austria-Hungary, Prussia, and Russia) there were again a series of events, following a history of armed conflicts earlier in the century (the 1830 November Uprising in Poland and Lithuania became a large-scale conflict, with tens of thousands of troops on both sides). There was another massive revolution in Hungary, within Austria (Vienna), in many of the Danubian states (Moldavia, Wallachia, Transylvania), in Denmark, in Prussia and throughout Germany - the list is a long one.
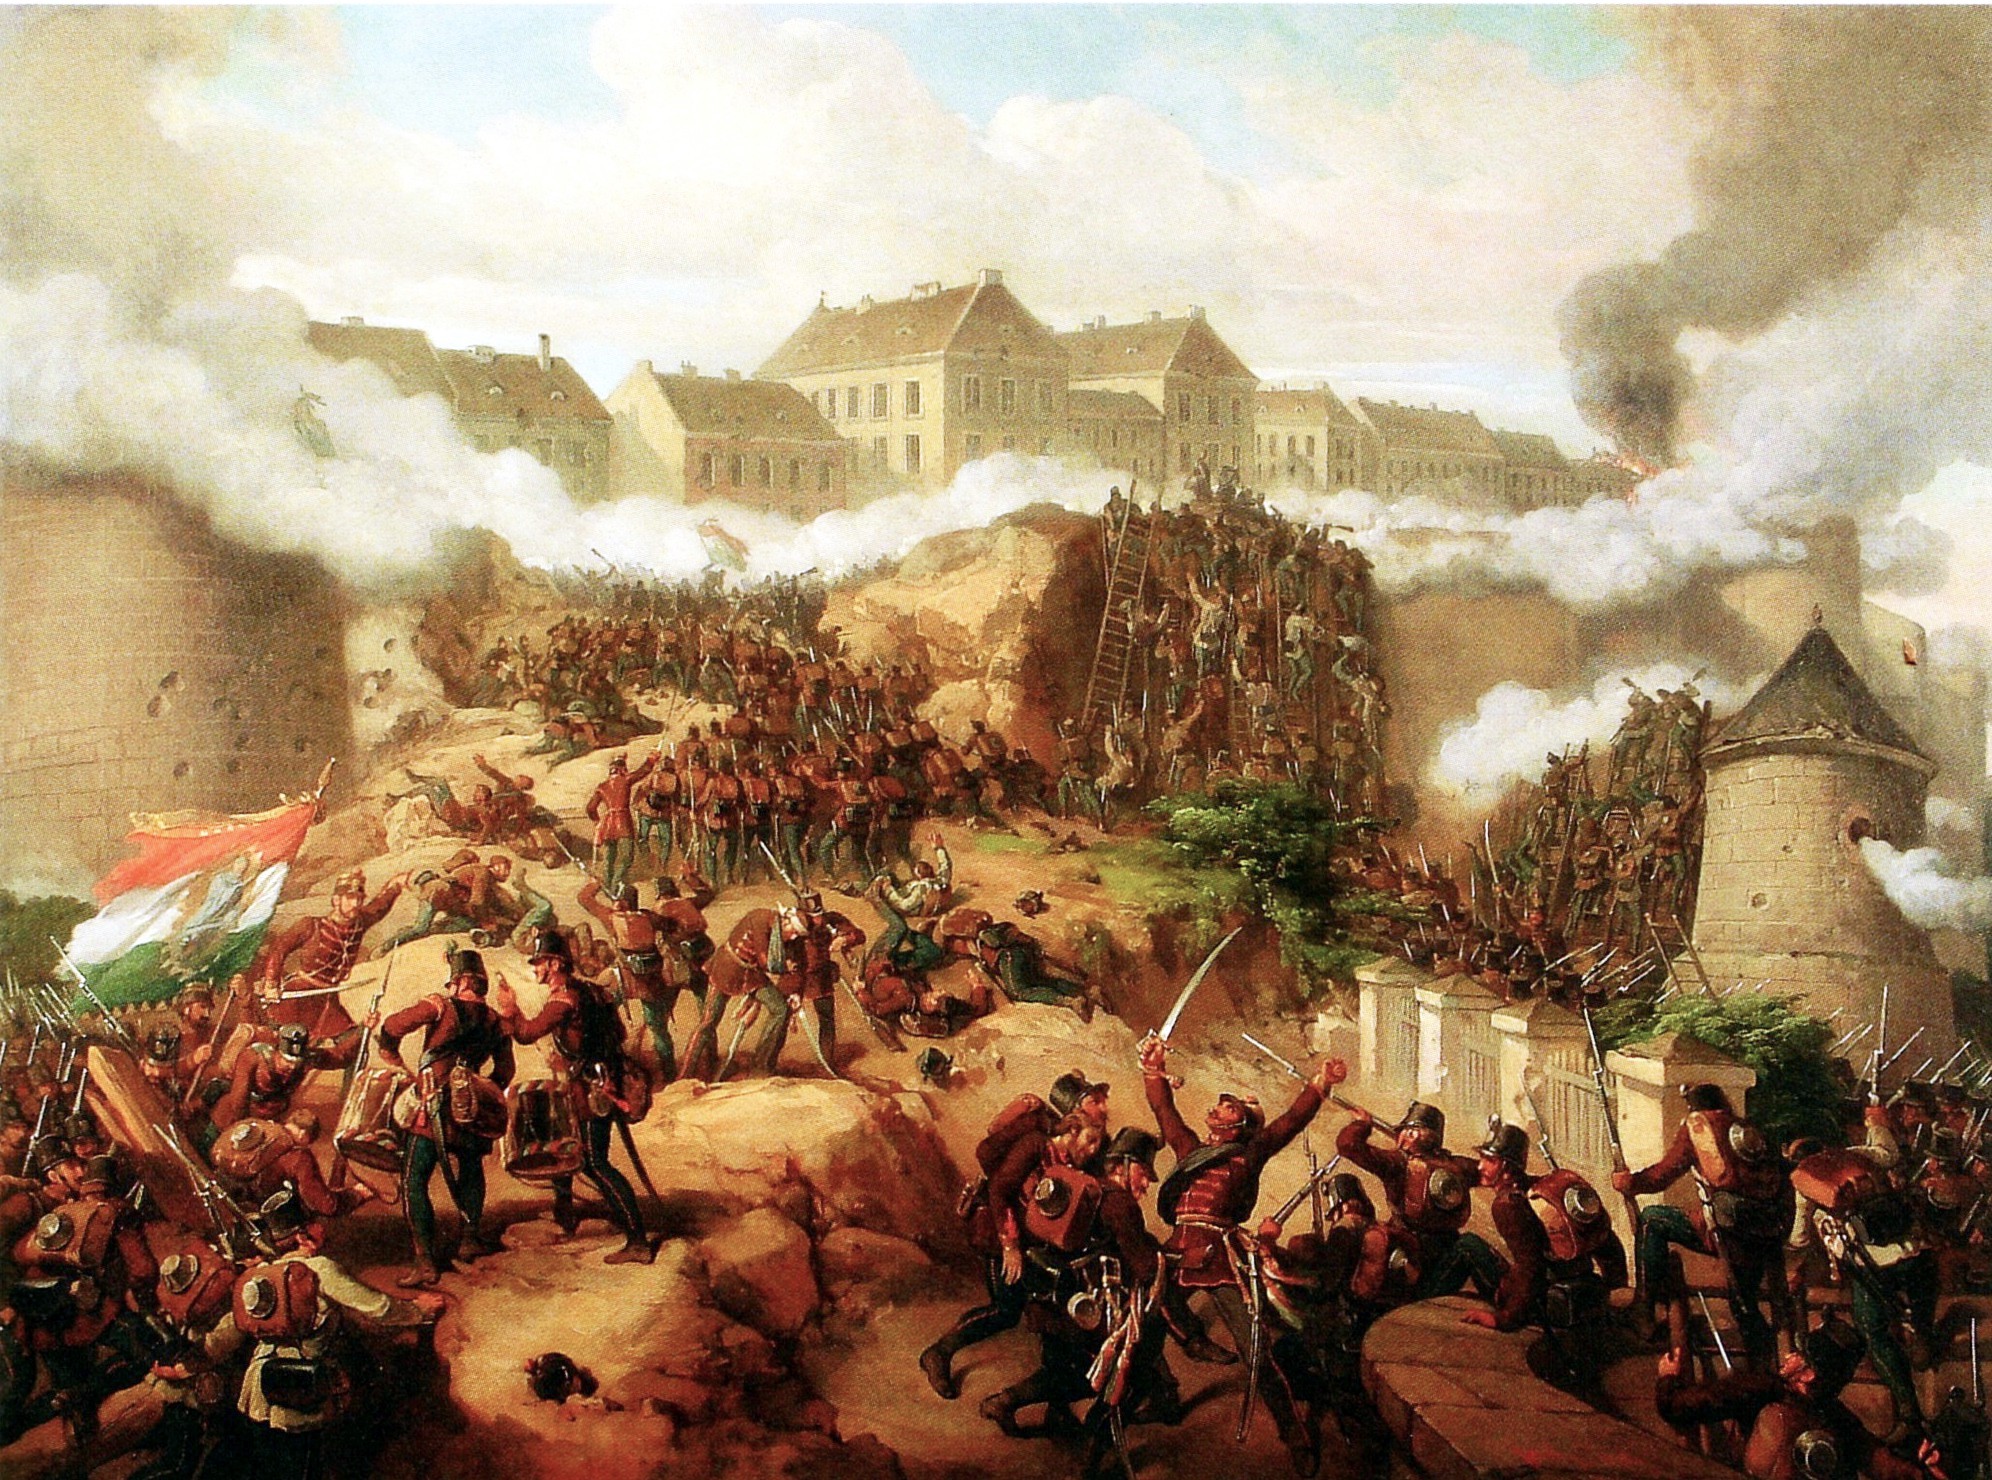
The Battle of Buda in Hungary
The revolutionaries were typically pursuing things which we take for granted: a role in government through some sort of elected representation, the existence of a constitution to safeguard their rights, and some level of checks and balances on the actions of the kings and emperors whose power was otherwise absolute. There were also economic drivers - widespread famine and unemployment, often driven by unwise protectionist trade policies and other economic blunders on the part of the rulers, made Europe ripe for revolution. Although the workers' movements which later typified European revolution existed, Anarchists, Socialists, and Communists were not a dominant force in these revolutions. That said, many figures who later became famous took part in the revolutions of 1848 - Frederich Engels, for example, was an active participant in the uprisings in Germany. Even Republicans were considered extremists in some countries (Republicans and Democrats both were anti-Monarchist, and therefore revolutionary). The very concept of Nationalism was considered revolutionary in many countries, as in Germany, Italy, and Poland, all of which were divided up among various governments into small Kingdoms, Grand Duchies, Principalities, etc.
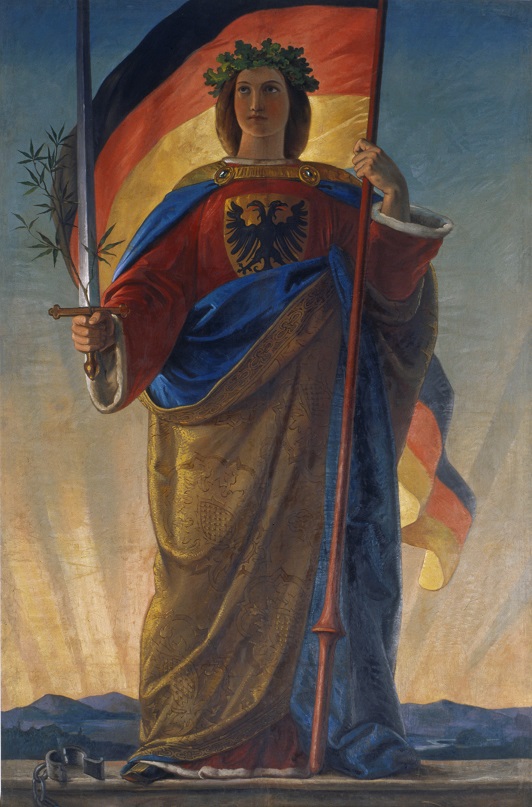
Germania, the symbol of a united Germany
Often, the revolutionaries were composed not only of the masses of the populace, but were aided by more formal military or quasi-military forces. Sometimes, as in Hungary and Italy, these were the result of mass defections among the government forces. Even in Prussia, the local militias were held not to be entirely reliable - in other states such forces had mutinied to fight for the rebellion. In some cases, professional revolutionaries would organize and equip forces to support the revolution - in Italy, we have Giusieppi Garibaldi with the Legione Italiana; in southern Germany, a force called the "German Democratic Legion" crossed the border from France, to support a (failed) march on Karlsruhe with other German forces. There are many examples. In the leadership of the revolutions of 1848, we often see veterans of former conflicts who were no longer welcome in the countries where they had earlier participated in revolutionary activity. There was a strong pan-European flavor to many of the uprisings.
The government forces likewise banded together in the cause of the existing order. We see the Russians intervening in the Hungarian conflict, the French and Austrians fighting together in support of the Pope, and the Prussians and Bavarians getting involved in conflicts outside their own borders within Germany (not yet a nation-state - that sort of Nationalist thinking could get you into trouble!) Again, there are many examples.
Militarily, the years of 1848 and 1849 fall into a transitional period. Flintlock muskets had given way to percussion weapons, and these in turn to percussion (Minie-type) rifles. In the May Uprising of 1849 in Dresden we see Prussian troops using the new Dreyse needlegun for the first time, a breech-loading weapon. Breech-loaders were a far cry from the norm, however - percussion muskets would be the standard weapons of the government formations in most nations, with only some select troops using the percussion rifle (the French adopted it in 1849, many German states not until the 1850s, Austria not until 1854, in Italy adoption was still partial in 1859, and the Russians were still using smoothbores in the Crimean conflict of 1853). Many of the rifled muskets that were used by the military would be conversions of older smooth-bore weapons. The arms of the revolutionaries would reflect this: muskets would dominate, some probably still being flintlocks, although rifled weapons are not out of the question - they were popular weapons for hunting. Revolvers existed, but only in their 'pepper-box' and single-action forms - typical military weapons were still single-shot muzzle-loading pistols. For artillery, we see the same pattern - in most countries, muzzle-loading smoothbore weapons would be typical. In France, for example, the famous 12# Napoleon was a smooth-bore weapon - its conversion into a rifled one lay 10 years into the future with the adoption of the La Hitte system.
The uniforms of government troops are likewise in transition, from their Napoleonic forms into the ones more familiar to us from the Crimean, Franco-Austrian, Austro-Prussian, and Franco-Prussian Wars. If players are determined to have the correct uniforms on their government troops, some research (and possibly some educated guess-work) will be required.
Ultimately, the revolutions and uprisings of 1848 and 1849 were either subverted (as in France) or defeated by reactionary forces, although some concessions were made in some countries. In the long term, however, the driving ideas behind the revolutions of this era were triumphant - representative government defined by a constitution, whether a monarch still sat on the throne or not - became the norm throughout all of Europe. Today, the activities of "royals" still make the news, but they are in the Celebrity section, not under Politics.
There are several types of figures involved in this game. All are mounted individually. Although designed to be played with 25mm/28mm figures, the game can be played with other sizes of figures as well. For 15mm and smaller scales, players may optionally halve all distance measurements, or use centimeters instead of inches. For larger scales, players may wish to double such measurements.
Figures will be divided into two classes: Player figures and Non-Player figures. Each is described below.
Player figures are one of a limited number of types. Each player is represented by a Revolutionary Leader, on foot or mounted, typically armed with a sword and other weapons, draped in the symbols of their cause, and striking an inspiring pose. Other non-player Revolutionary Leaders may also appear during the game. These are classed as Veteran Officer/Soldier for game purposes.
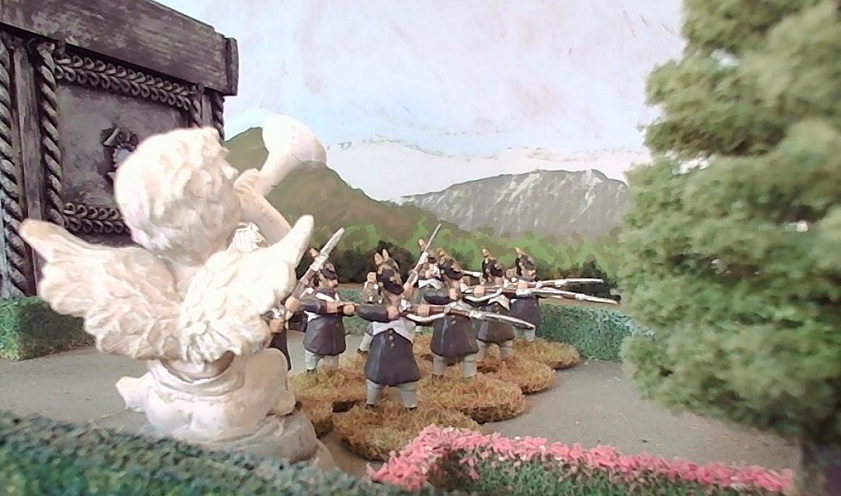
The core Player force will be a group of 12 - 24 "professional" revolutionaries, who are veteran soldiers - they are often ex-regulars from the national armies of the period, or veterans of other revolutionary struggles. In game terms, they are usually classed as Veteran Soldiers, although some may be designated as Average Soldiers by the scenario. They are typically armed with a mix of rifles, muskets, and other weapons (scythes were popular in many parts of Europe), but will on average be better-equipped than ordinary revolutionary volunteers. They wear some form of uniform, often based on the ubiquitous peasant smock (Garibaldi's troops liked to wear them in red, other nation's revolutionaries often chose other colors.) These uniforms often feature distinctive field signs (based on a tri-color in many cases), and "revolutionary" or "republican" items such as broad-brimmed hats with a high peak (the Calabrian hat was very popular in Italy and elsewhere, as was the Phrygian cap of the French Revolution). Items of a more conventional military nature would often be worn (kepis, both low- and high-crowned, typically). The units would almost always present a somewhat rag-tag appearance, as there would rarely be a sufficient issue of uniform clothing. Equipment was often that liberated from government armories. The vast majority of such forces will be infantry. Small numbers of cavalry or mounted scouts are permitted, however, and even guns manned by revolutionary artillerists. These last two categories would be fairly rare, however - the conflict being depicted should be researched to see if such elements were used historically by the revolutionary forces in question. Cavalry and artillery would be organized into their own, smaller units, generally of only a small number of figures (4-6 mounted troops, or an artillery piece and 3-6 gunners).
Garibaldi and his Red-Shirts in Rome
Around this core of veteran revolutionaries would form one or more similar-sized groups of volunteers. These would be ordinary citizens who have taken up the cause of the revolution. In game terms, these are classed as Volunteer/Conscript Soldier. If armed at all, they will frequently have only improvised melee weapons (scythes, clubs, pitchforks, etc.) but may also be carrying pistols or long arms of some description (hunting rifles, out-dated flintlock muskets, etc.). Many will be completely unarmed, relying on whatever stones, bricks, etc. are available. If a government armoury is seized during play, these volunteers may become better armed, but that is not a very common occurrence. Revolutionary volunteers may join the Player forces during the course of the game, sometimes accompanied by another Revolutionary Leader. Government troops of various types may also be convinced to join the Player forces (the author's collection has two standard bearers for every government unit - one with historical colours, and the other with a revolutionary tricolor). Although government troops who switch sides will generally do so on an individual basis, it is possible for entire units (including their guns, if artillery) to join player forces. Volunteer Revolutionaries (unless mutinying government troops) are almost always on foot.
There are a larger number of different types of non-player figures, as these represent not only enemy soldiers but also civilians of various types. Each type of Non-Player figure is described below.
Note on Government Troops: Cavalry, infantry, and artillerists are all given a quality rating (Conscript, Average, Veteran), which is used when they make actions or are made targets. If cavalry, use the "Actor is Mounted" or "Target is Mounted" check boxes as appropriate.
Conscript Infantry: Conscripts move more slowly and fight less effectively than Average soldiers, although better than civilians. Conscripts will tend to be more numerous when they appear on the tabletop. They represent soldiers with little or no combat experience, but who have been at least minimally trained in the business of war. Often, conscripts will represent the local militia forces, which often had strong ties to and sympathies with the revolutionaries.
Average Infantry: Infantry with some combat experience and training, but without the professionalism and esprit de corps which would make them better soldiers. They move faster and fight better than Conscripts, but not as well as Veterans. They represent the regular soldiers of the local forces, and will sometimes side with the revolutionaries against their own government, but generally not.
Veteran Infantry: This includes well-trained and motivated troops, belonging to formations with a high degree of professionalism and esprit de corps. Often, they will be brought in from areas outside the one in which the uprising is taking place, to guarantee they have no personal ties with the local populace. They will almost never disobey orders when faced with revolutionaries.
Light Artillery: Artillery units are represented by a gun and 4 crewmen. For Fire actions, use the quality rating of the crew (Veteran, Average or Conscript) as the Actor. For movement, artillery is Transport. Crew are considered soldiers of the appropriate quality for targeting purposes. This category includes guns up to 8#, and the 6# "Prussian" howitzer. Individual artillerists which join the revolutionary cause are assumed to have percussion muskets.
Field Artillery: Artillery units are represented by a gun and 4 crewmen. For Fire actions, use the quality rating of the crew (Veteran, Average or Conscript) as the Actor. For movement, artillery is Transport. Crew are considered soldiers of the appropriate quality for targeting purposes. This category includes guns of more than 8# (typically 12#), and howitzers larger than the 6# "Prussian" howitzer. Individual artillerists which join the revolutionary cause are assumed to have percussion muskets.
Transport: This category includes wagons, limbered guns, mule trains, and any other form of slow conveyance. Transport are not allowed to perform offensive actions. (Note that crew/drivers may fire, charge, and attack if appropriate. They will do this as Soldiers of the appropriate quality, however, not as Transport. If riding on the transport, they are considered mounted for the purposes of firing, but not for charges or attacks.)
Civilians: Plain Civilians (as opposed to revolutionary Volunteers or reactionary Mob members) are a different type of Non-Player figure, in that they exist for the purposes of providing information to players. They represent neutral bystanders such as townsfolk or villagers. Once questioned (using a Parley with Civilians action) they are removed from play. Thus, it doesn't matter how many are placed on the tabletop when they appear. Two or three figures is sufficient. Civilians may not perform offensive combat actions. When contacted by enemy troops, they are removed from play.
Reactionary Mob: These are counter-revolutionary civilians who have taken up arms at the behest of priests, aristocrats, or other members of the establishment. They are typically armed with improvised weapons (or nothing at all) but may be carrying firearms. They are not as motivated as revolutionary volunteers, but will not listen to reason - you may not deliver impassioned oratory to them, or even parley with them.
Aristocrats: Aristocrats represent the empowered nobles of the old regime, now running for their lives. If you find them, they can be interrogated, and may provide useful information. They may also act as emissaries, carrying revolutionary demands to the powers that be. Once interrogated or employed as emissaries, they are removed from play.
Enemy Headquarters: Enemy Headquarters are the staff of the government's army, represented by officers and staff members, mounted or on foot. They tend not to be heavily armed (usually just pistols) although they may have heavier-armed guards. They are always Veteran. They function like any other soldier, except that they can be questioned/searched, being officers.
Enemy Officers: Enemy Officerss are usually mounted, representing veteran soldiers carrying orders/messages or scouting the area. Typically they will only have pistols, but can also carry carbines (whatever is modelled on the figure). Being officers, they are Veteran, and if incapacitated may be interrogated or searched. Like Aristocrats, they may sometimes be willing to act as emissaries to the established powers. Once interrogated (etc.) they are removed from play.
Enemy Convoy: This is a train of pack animals or wagons (classed as Transport) carrying government arms and ammunition. If captured (all guards killed/incapacitated or forced to flee) the contents of a convoy may be used to arm any figures in the unit which captured it with whatever arms are used by the government troops.
The terrain needed to play is nothing out of the ordinary, but there are a few pieces of terrain that may appear on the tabletop after the initial set-up, as a result of player actions, events, and encounters.
Things which may appear on the table as a result of random encounters include government strongpoints and the location of political prisoners, aristocrats and politicians in hiding, stashes of government papers and cash holdings, and ammunition/supply dumps. Many are simply markers, which may appear on the tabletop within existing terrain features. Others will require more elaborate models.
Government strongpoints don't need to be fancy, and can be represented by a small square entrenched area or similar, or can be modelled as fortified buildings. These are meant to be small outposts, not major military forts (they usually provide hard cover as opposed to being fortifications in game terms).
When political prisoners and aristocrats/politicians in hiding appear, these are modelled using the figures of the actors, plus any guards specified by the game interface. Prisoners may be kept in a small building, an existing structure, a tent, etc. as seems appropriate. Hiding figures will typically leverage any available structures or natural terrain features in the area in which they are said to be located. Supply dumps may simply be piles of crates and barrels, or may be stored in tents or any available structures. Having some small buildings (such as huts) may be useful, which are deployed on the table to provide locations for hiding aristocrats/politicians, supply dumps, etc. These would typically provide only soft cover. Stashes of government papers and cash reserves are best indicated with a pile of crates or boxes. The referee may choose not to reveal the nature of such stashes to players to enhance the game.
It is also possible for players to build barricades during the course of play. These should be represented as piles of crates, barrels, sacks, and other such items, piled into a defensive wall, with segments of around 3 inches in length. Barricades provide hard cover, as opposed to fortifications (which would be more formal military constructions).

Fighting against the Austrians in the streets of Bologna
Table space requirements for this game are nothing out of the ordinary. The larger the table space, the longer the game will generally take, requiring more player troops. A table smaller than 3 or 4 feet on a side will be noticeably cramped. When setting up the table, it is a good idea to leave it fairly open, once basic terrain and that needed for the intended scenario are placed, to leave room for the random terrain pieces which may appear. If the action takes place in a city, it should not be completely full of buildings, but should also allow for parks, squares, and other open spaces. If set in the countryside, having a village or two on the tabletop helps to keep play interesting, along with the typical wargames terrain of hills, roads, woods, streams, etc.
No dice are needed to play the game. Rulers and/or tape measures are needed, as for most miniatures games. Printing this document is not a bad idea, as your tablet or computer will be occupied by the game interface. You will only need to run one instance of the game interface at a time, although for a large game with multiple referees acting at the same time you might want to run one per referee.
Markers are needed for several different purposes. Flintlock rifles and artillery which have fired need to be marked. Small blobs of cotton wool work well for this. Units which have failed morale also need to be marked. Casualty figures will work, or any type of normal marker. Also needed are markers showing which units have already used their initiative during a turn. These can be counters, blobs of brown cotton wool representing kicked-up dust, or whatever seems good.
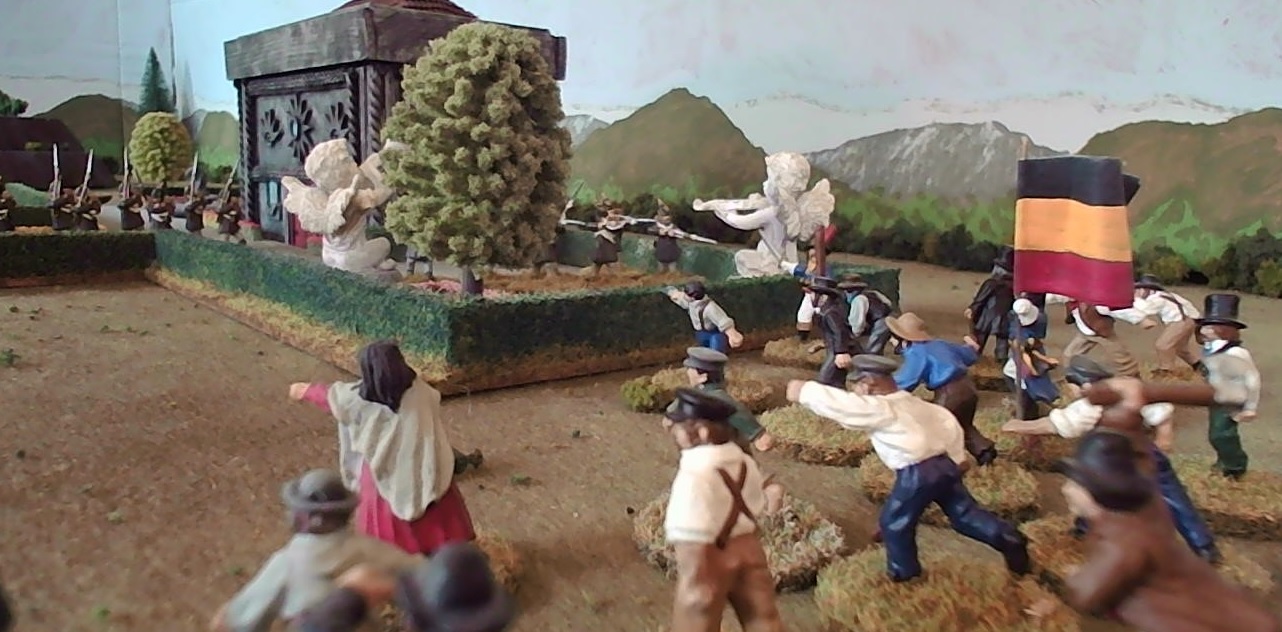
The Baden revolutionaries spy a group of their aristocratic oppressors.
The game always employs a referee, whose job it is to operate the game interface and to run all the Non-Player figures in accordance with the rules. It is the referee's job to make the game fun and challenging for the players - highly competitive personalities whose only desire is to crush all opposition will tend to make poor referees. If there are several players, one may choose to play the government forces as they appear, which can also be fun. It is possible to have more than one referee operating a games interface if there are a large number of participants. This is fine, so long as the referees can coordinate with each other. No computer networking is required to do this - only two or more devices which can run the game interface.
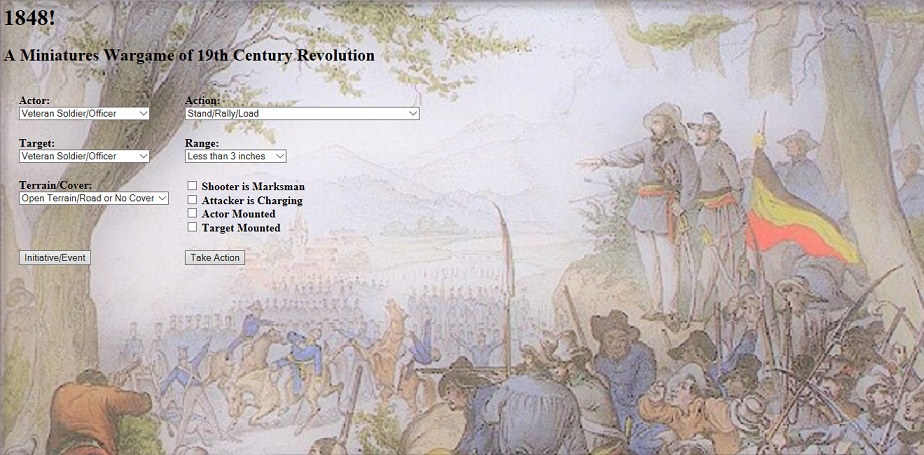
The game interface - one simple screen
Players should each be given one or more Player units as their command. It is important that the referee be reasonably familiar with the rules and guidelines of the game. This is less important for players, as the referee can help keep them informed as to the relevant details during play.
This game is played in a series of repeating turns. Each turn, all of the figures on the tabletop will take one action. These are organized into a series of initiatives. The figures themselves are organized into groups (although the composition of groups is very fluid), and some actions may be made by an entire group. The sequence of play is as follows:
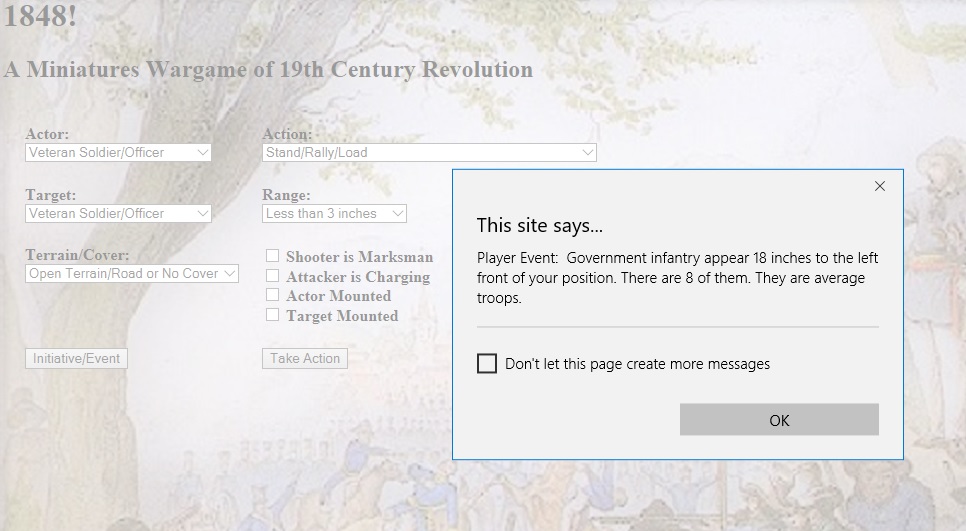
An event generated by clicking the "Initiative/Event" button
The Player gets the initiative, and may make actions with all figures in one unit - generated by clicking the "Initiative/Event" button
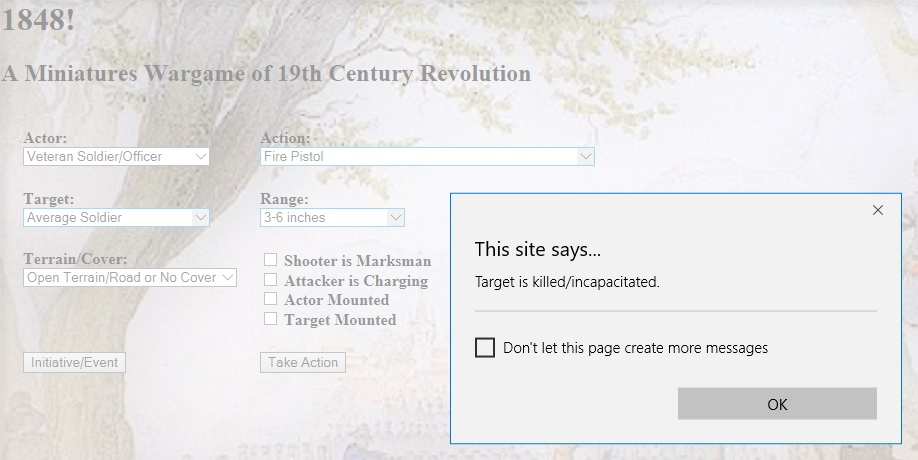
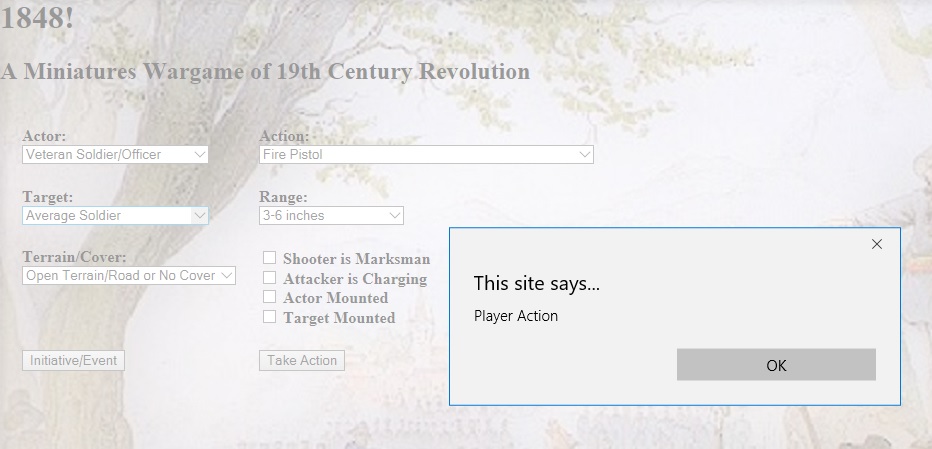
The result of an action - the Player has fired a pistol and hit - generated by clicking the "Take Action" button
Units: Figures are organized into units of one or more figures. Each Player unit must have an officer or NCO as a member (on-the-spot field promotions will occur when all existing officers/NCOs are killed, so that a unit always has at least one NCO). For Non-Player figures, units are the groups in which they appear first on the tabletop (or are designated at set-up). Figures within a unit must remain within 3 inches of another figure in their unit if possible at all times - if casualties or other tabletop events violate this rule, the affected figures must move to correct the situation. Units may split into "sub-units" which are themselves just smaller units for game purposes, so long as each has an officer or NCO (no field promotions allowed for forming sub-units). Units of a similar type (infantry, cavalry, etc.) may also join to form a single unit, so long as they are within 3 inches when the merging takes place. The new merged unit will take on the quality level (Veteran, Average, Conscript, Civilian) of the majority of its figures, using the better rating when the numbers are equal. (Individual figures retain their rating, but the unit itself will use the group rating for morale checks and group actions). Units are split and joined as players desire, at the start of any friendly initiative used to activate any of the affected figures. Splitting and merging of units does not count as an action.
Groups: Groups are made up of figures from the same unit, after splitting or joining have been performed. The members of the group are identified, and the figures will then perform a group action (see below). Not all actions are allowed to be performed by groups. The entire group will be subject to a single interaction with the program interface (select the action and other fields as necessary, and click Take Action.) For group actions, select the best figure (that is, an officer or NCO) unless specified otherwise under Actions, below.
Note that any given figure may only act once during the turn, except in the case of charges (see below). Any given unit may only take initiative, allowing its member figures to act, once during the turn. When the initiative is taken, all figures must act. Morale checks and tests against artillery do not count as actions, but are made as required by play.
If during play there is a problem with the game interface (if it freezes), reload the page using the browser controls and continue play (it is a Web page). You must allow Javascript to run, and allow the window to show dialogue boxes. If you accidentally disable or disallow these features in your browser, reload the page (you may need to re-launch the browser or clear the memory cache).
If an action is misrepresented to the computer through user error, ignore the results, enter the correct information, and perform the action again. The fields relevant to each action are listed below.
The actions of Non-Player figures can have a large influence on play. These are to a large extent determined by the referee, using the following guidelines. (Note, however - as stated above - that it is not the referee's job to win the game. Their job is to generate a fun and challenging game for the players.) Here are some guidelines for how the various Non-Player figures will behave.
Enemy infantry and cavalry: These will try to kill player troops (their highest priority). They are not, however, suicidal, and may assume to be guided by officers and NCOs with some tactical expertise.
Enemy Artillery: When encountered, government artillery will fire on any revolutionary unit they encounter, unless they are unable to stop an enemy unit from making contact, at which point they will flee.
Enemy Convoys: Despite having guards, convoys will always run from danger. Guards will attempt to allow the convoy to escape. Like other types of non-players, convoys will have a destination on the far side of the table, but will flee off any nearby table edge if threatened.
Enemy Headquarters: These groups of officers and commanders will avoid risk at all costs. They know they are a valuable target. If pressed, however, they will fight.
Enemy Officers: These are individual enemy hussars, quartermaster staff, and similar types of officers who are either carrying orders or scouting. Their job is not to kill the enemy, but to exit at a specific point from the tabletop, alive. (See below). They will resist capture by both running and fighting.
Aristocrats: These are the priviledged members of the current regime, and they will avoid capture if possible. They will not fight however, but will submit to interrogation when flight becomes dangerous.
Civilians: Civilians will generally remain where they are discovered, other than to avoid fighting. They will readily agree to talk when approached.
Reactionary Mobs: Reactionary mobs are not interested in talking or flight - they will fight and act aggressively toward any revolutionary agent they discover. They are not known for their tactical acumen.
Government troops defending the grounds of the Archduke's palace.
Figures in both Player and Non-Player units make actions during the game, from the list below. Some actions are only for Player figures/groups - these are indicated in the descriptions below.
Stand/Rally/Load: This action may be taken by individuals or groups. It involves one of three different activities: standing and doing nothing; rallying wavering troops; and reloading flintlock rifles and artillery. Note that reloading and standing may be conducted as a single action by groups performing both. Pistols, carbines, muskets, and percussion (Minie) rifles do not require reloading. Flintlock rifles - when fired as muskets - also do not require reloading (see below). Light artillery must be reloaded after firing, which takes a single Load action. Field artillery requires two Load actions after firing. Loading artillery is always a group action involving the entire crew. (A minimum of two crewmen are required to load artillery.)
Move: This action may be taken by individuals or groups. If used as a group move, the slowest figure in the group is selected as the Actor (that is, Veteran, Average, Conscript, Civilian, Transport in order of fastest to slowest, with Actor Mounted checked only if all figures are mounted). The terrain through which the move will be conducted must be specified (see below), as must the Actor and Action. The Actor Mounted box must be either accurately checked or unchecked. Other fields are not used.
Charge: This action may be taken by individuals or groups. To initiate a charge, only the Actor, Action, and Terrain/Cover selections need to be made, and the Actor Mounted box checked if appropriate. Terrain is the ground over which the charging figure(s) will move. There will be a series of subsequent actions if the charge goes home (see below).
Attack (Fists/Improvised Weapon): This action is performed by individuals. To make an attack, the figure must be in contact with the enemy figure which is the target of the attack. Actor, Action, Target, and Terrain/Cover (the cover of the figure being attacked) must be selected. Boxes for Actor Mounted, Target Mounted, and Attacker is Charging must be checked if appropriate.
Attack (Lethal Weapon): This action is performed by individuals. To make an attack, the figure must be in contact with the enemy figure which is the target of the attack. Actor, Action, Target, and Terrain/Cover (the cover of the figure being attacked) must be selected. Boxes for Actor Mounted, Target Mounted, and Attacker is Charging must be checked if appropriate.
Throw Brick/Stone: Any dismounted figure, unarmed or otherwise, may perform this action, and it is much favored by mobs both revolutionary and reactionary. It is always performed as an individual action. Actor, Action, Target, Range, and Terrain/Cover (the cover of the figure being attacked) must be selected. If the thrower has a particularly good arm, the Shooter is Marksman box may be checked (as identified by scenario).
Fire Pistol: This action is performed by individuals armed with pistols (as per scenario). Actor, Action, Target, Range, and Terrain/Cover (the cover of the target figure) must be selected. Boxes for Shooter is Marksman, Actor Mounted, and Target Mounted must be checked as appropriate.
Fire Carbine: This action is performed by individuals armed with carbines (as per scenario). Actor, Action, Target, Range, and Terrain/Cover (the cover of the target figure) must be selected. Boxes for Shooter is Marksman, Actor Mounted, and Target Mounted must be checked as appropriate.
Fire Musket: This action is performed by individuals armed with muskets (as per scenario). Actor, Action, Target, Range, and Terrain/Cover (the cover of the target figure) must be selected. Boxes for Shooter is Marksman, Actor Mounted, and Target Mounted must be checked as appropriate.
Fire Rifle: This action is performed by individuals armed with percussion (Minie-type) or flintlock rifles (which must be loaded). Actor, Action, Target, Range, and Terrain/Cover (the cover of the target figure) must be selected. Boxes for Shooter is Marksman, Actor Mounted, and Target Mounted must be checked as appropriate. When a flintlock rifle has fired, mark it so that you know it needs to be reloaded (marker is removed using a Load action).
Fire Light Artillery: This action is taken by a group consisting of the entire crew of the artillery piece firing. The type of ammunition loaded (roundshot or cannister, or, for howitzers, shell) will determine the figures affected by fire. Specify the direction (cannister), path (roundshot) or target point of fire (shell). Only the Actor and Action fields need be selected. Other factors will be taken into account when target figures test for casualties. When Light Artillery has fired, mark it so that you know it needs to be reloaded (marker is removed using a Load action).
Fire Field Artillery: This action is taken by a group consisting of the entire crew of the artillery piece firing. The type of ammunition loaded (roundshot or cannister, or, for howitzers, shell) will determine the figures affected by fire. Specify the direction (cannister), path (roundshot) or target point of fire (shell). Only the Actor and Action fields need be selected. Other factors will be taken into account when target figures test for casualties. When Field Artillery has fired, two markers are placed on it so that you know it needs to be reloaded (one marker is removed per subsequent Load action).
Check Morale: This action is taken by units acting as a single group. It does not use their action for the initiative/turn, but is done in response to battlefield events. The quality of the unit is determined by the best figure present (Veteran [if an officer/NCO is present, or for Veteran units], Average, Conscript, or Civilian, in descending order.) Transport does not check morale - attendant figures do. (Assume a Civilian rating for drivers and non-combat personnel.)
Test vs. Blast: If within the effective radius of a shell blast (3 inches) each figure must immediately make this test. Select Actor (the figure testing) and Terrain/Cover fields, and check the Actor is Mounted box if appropriate. This action is performed by individuals as required by tabletop events. It does not use the figure's action for the initiative/turn. Transports and each of their attendant figures must perform this test if required, the attendants testing as Soldiers of the appropriate quality, and the animals/equipment as Transport.
Test vs. Roundshot: If under the path of roundshot, each figure must immediately make this test. Select Actor (the figure testing), Terrain/Cover, and Range (from the firing gun) fields, and check the Actor is Mounted box if appropriate. This action is performed by individuals as required by tabletop events. It does not use the figure's action for the initiative/turn. Transports and each of their attendant figures must perform this test if required, the attendants testing as Soldiers of the appropriate quality, and the animals/equipment as Transport.
Test vs. Cannister: If within the arc of fire of cannister (60 degrees, centered on the facing of the firing gun), each figure must immediately make this test. Select Actor (the figure testing), Terrain/Cover, and Range (from the firing gun) fields, and check the Actor is Mounted box if appropriate. This action is performed by individuals as required by tabletop events. It does not use the figure's action for the initiative/turn. Transports and each of their attendant figures must perform this test if required, the attendants testing as Soldiers of the appropriate quality, and the animals/equipment as Transport.
Parley with Civilianss: This action is taken by an individual or group within 6 inches of the Civilians in question. It may only be performed once per game for any given group of Civilians, and only by Player forces. Once they have been engaged in parley, the Civilians are removed from play.
Give Impassioned Oratory: This action may only be made by Player figures who are revolutionary leaders, and is always performed individually. They must be within 6 inches of the intended audience of their revolutionary eloquence. It may not be performed during a turn when any attacks have been or will be made on the unit serving as the audience of the oratory by the revolutionary forces. Any given unit may only be subject to impassioned oratory once per game. The Actor, Action, and Target fields must be selected.
Search Structure: This action is only used by Player figures (the government presumably already knows where it has put things). It may only be performed by individuals who are in contact (inside of) the structure being searched. Once anything substantive has been discovered, the building may no longer be searched.
Scout Government Strongpoint: This action is performed by individuals within 12 inches of an enemy outpost with a clear line of sight. It may only be performed once per game for any given Enemy Outpost, and only by Player forces.
Question/Search Government Officer(s)/Aristocrat(s): This action is performed by an individual in contact with the enemy officer(s)/aristocrat(s) in question, after any combat has already taken place, and the officer or officers has/have been defeated (or are incapable of combat due to morale failure). After interrogation/search, remove the officer(s)/aristocrat(s) from play (they are made prisoner or left for dead, or are performing other function).
Build Barricades: This action is only used by Player figures. It may be conducted only by groups. An inch of barricades (counting as hard cover for those sheltering behind them) is constructed for every three figures in the group.
Break Through Gates/Barriers: This action is only used by Player figures. It is conducted individually by figures in contact with the barrier being broken down, and may be repeated until successful. Once broken down, the barrier is removed.
Negotiate with Government Representative: This action is only used by Player figures, who must be revolutionary leaders or their appointed representatives, and who are within 6 inches of their government counterpart(s). The situations in which this action are useful must be provided by the game interface - players cannot simply approach government figures and negotiate with them. This will always be the result of having sent an emissary to the government forces, which may be done by a willing government officedr or aristocrat (determine willingness/suitability by interrogating them). No attacks by government forces will be made during the turn before negotiations are conducted, nor may any attacks have been made by Player forces on those of the government.
Free Political Prisoners: If you discover that political prisoners are being held by the government, and you defeat their guards, you may use this action to determine who you have freed and whether or not they can help your cause. It is performed by an individual figure, and may only be used by a revolutionary.
The veteran core of the Constitutionalist force encounters the local soldiery.
Movement is performed using the movement rate supplied by the games interface. The number provided depends on the terrain through which the figure(s) are moving. In some cases, terrain will affect the movement distances as given by the games interface. If a figure spends a portion of their movement in rough terrain, but most of it in the open or on a road, the movement rate should be generated using the open/road terrain selection, then, for units on foot and for Transport, movement through the rough terrain will be reduced by half; for mounted units, it will be reduced by three quarters. The reverse is also true - if a figure moves mostly in the rough, but partly in the open or on a road, the distance will be generated using the Rough/Steep selection, but movement in the open or on the road will be doubled for foot figures and transport, and quadrupled for mounted figures. Linear obstacles such as walls or hedges reduce overall movement by 1 inch. Some types of terrain are impassable to some troops types (an infantryman can crawl through a window - a linear obstacle - while a mounted cavalryman or a limbered artillery piece would find it impassable). Common sense should be employed when moving figures - the referee's should be employed when the player's is absent.
Figures may choose to use less than their full movement. Movement may be in any direction or combination of directions, up to the specified (and adjusted) distances. Figures may never move through other figures, or come into contact with enemy figures other than by making a Charge action or by being charged. Figures must at all times be within 3 inches of another figure in their unit, and must attempt to remain this way, moving as soon as possible to correct the situation if casualties or other events create a distance larger than 3 inches.
Some activities qualify as movement but do not involve crossing the tabletop. Mounted figures may dismount at any point as part of their movement. Dismounted figures may remount at any point during their movement. The exception to remounting and dismounting is that you may not perform this activity during a Charge action. Artillery may choose to limber or unlimber instead of using their movement for the turn. Unlimbered guns may load and fire, but cannot move other than to adjust their facing in place. Limbered guns cannot fire or load. To move or limber/unlimber with a gun is a group action involving all figures in the unit, and requires a full Move action to perform.
Generally speaking, terrain is considered to be as it is modelled on the tabletop. Any non-obvious aspects of the terrain (whether a river is fordable, for example) should be decided and agreed before play starts. Any impassable terrain should be identified, and terrain which is considered steep or rough should be identified, as should linear obstacles. If a judgement call is needed, the referee is the final arbiter of such matters.
Firing is divided into two categories: firing personal weapons (throwing stones/bricks, pistols, carbines, muskets, and rifles) and firing artillery (light and field guns and howitzers). Personal weapons may only be fired by figures which have an unobstructed line of sight to the target figure, judged by examining the tabletop. If an unobstructed line exists between the base of the firing figure and the base of the target figure, fire is possible. Note that you may not fire through gaps between figures of less than 1/2 inch. Figures in combat contact with friendly figures are not legitimate targets.
If the result of a fire action is "Target is killed/incapacitated" it is removed from play, having become a casualty. If an enemy officer, the figure may still be interrogated or searched. Figures made casualty in artillery checks are similarly removed from play.
Some types of obstruction (foliage) do not stop fire, but provide cover. When firing at artillery and transport, the crew/drivers are the only legitimate targets - the gun, wagon, etc. is not. A target may be seen up to 2 inches into or through foliage, unless it is very dense (hedges). A target which is partially visible or only visible through foliage or other terrain insufficient to stop a bullet is judged to be in soft cover. A figure partially visible behind stronger terrain (walls, rocks) is judged to be in hard cover. A figure behind fortifications is judged to be in fortifications for purposes of fire. Note that some cover (such as hasty trenches) provides hard cover but does not qualify as fortification - fortifications are prepared military works.
Different weapons have different ranges. If a figure fires and gets an "out of range" result, the action has still been taken.
Flintlock rifles are a special category of personal firearms. They can be fired in one of two ways - as rifles, with a tightly-fitted load which has increased range and accuracy, or as muskets, with a loosely-fitted load which does not benefit from the rifling in the weapon's barrel. Riflemen carried both types of ammunition. To fire a rifle as a rifle (using the "Fire Rifle" Action), it must be loaded. This requires a separate action. (All figures with rifles begin the game with rifle ammunition loaded.) In order to fire a rifle as a musket (using the "Fire Musket" Action), no loading is required. Because the smaller rounds were much easier to load, a rifleman may fire his (loaded) weapon as a rifle, and then fire it as a musket in the following action.
During this period, the Prussians used the famous breech-loading Dreyse needlegun for the first time in anger. If troops are armed with this weapon (it must be specified by scenario) they can fire three times as a single action. As for the Minie-type rifle, no loading is required. It is suggested that this weapon be restricted only to Veteran government troops, and even then only when it was used historically, as it is incredibly powerful.
Artillery fire requires that the unit has unlimbered the gun. There are three types of ammunition which artillery may fire. Howitzers fire shell or cannister. Other types of artillery fire either roundshot or cannister. When a gun is loaded, the type of ammunition loaded must be specified, or it is assumed to be roundshot (for howitzers, shell).
To fire cannister or roundshot, the facing of the gun may be adjusted up to 30 degrees left or right. Once done, for roundshot a line is drawn from the barrel of the gun and in line with it out to the maximum range of the gun (48 inches for light artillery and 72 inches for field artillery). Any base crossed by this line - friend or foe - must test versus roundshot, to determine if they are made a casualty. For cannister, a cone-shaped arc of fire covering 60 degrees is placed, centered on the barrel of the gun and extending outward 24 inches for light guns and 36 for field guns. Any figure - friend or foe - within this arc must test versus cannister to see if they become a casualty.
Firing shell from a howitzer involves selecting a point where the shell is intended to explode, within an arc 30 degrees to either side of the gun's facing. The point of detonation may be adjusted by the game interface. Any figure - friend or foe - within the blast radius of the shell must test versus blast to see if they become a casualty. When firing shell, the range must be specified accurately on the games interface - when firing roundshot and cannister, range is only important when figures are testing against the effects of munitions. Note that equipment such as artillery pieces and wagons must also test (as Transport) versus blast when within the blast radius.
Charges involve not only a type of movement, but also an attack, and potentially involve a reaction on the part of the figure who is the target of the charge. Both Charge actions and subsequent reactions may be made by groups if appropriate - the reacting group may consist only of figures against whom charges have been declared. You may only charge an enemy figure which you can see - there must be an unobstructed line of sight as for firing. Charges are conducted as a series of actions, which will consume the actions of both the charging and charged figure for the turn unless the charge fails to reach its target (in which case only the charging figure's action is used).
The first thing is to move the charging figure the distance provided by the game interface. This is governed by all normal movement rules. If the charging figure contacts its target, the target figure may be allowed a response. This requires that it has not yet acted during the turn. A response action (reaction) may involve a Move action (to get away from the charging figure or into cover, or to advance toward the charging figure), or the fire of a personal weapon. Such fire is made using a range bracket determined by the quality of the firer: for Veterans, use the shortest range bracket; for Average troops, the range is half the distance from where the charging figures starts their move; for Conscripts and Civilians, it is the distance to where the charging figure started their move. If a reaction Move takes the charged figure out of contact with the charging figure, the charging figure must use any left-over movement from their earlier charge move to attempt to re-establish contact with the target figure.
If fire at charging enemies as a reaction causes any casualties, then - after all such reaction fire has been resolved, but before attacks are resolved - the charging unit must check morale. If they Waver, they will fail to close with their targets, and stop 1 inch short of their foes.
If the figures are in combat at this point, the charging figure will make an Attack action on the target figure. If the target figure survives, it will make an Attack action on the charging figure. After all attacks are resolved, any unit taking casualties will check morale as usual.
If the result of an attack is "Target is killed/incapacitated" it is removed from play, having become a casualty. If an enemy officer, the figure may still be interrogated or searched.
It should be noted that Transport and Artillery, when acting as the targets for charges, involve charges made against the crew and drivers, rather than the artillery piece or the transport wagon, animals, etc. Thus, reaction moves will involve only these figures: guns, wagons, draught animals, etc. will be abandoned.
If you leave it up to the peasants, the palace will never be the same!
The morale system reflects the onset of panic in units which are taking casualties. The morale rules are simple: after any initiative during which any unit takes one or more casualties, it must perform a morale check. Morale checks are performed after the acting unit has made all actions for the initiative (with the exception of morale checks made by charging units from reaction fire - see above), and the results will affect every figure in the unit checking morale. The morale check is not a regular action, and does not count as the unit's action for the turn. All units begin play with a Solid status. If they fail a morale check, their status goes to Wavering. A Wavering unit is only allowed to make one of two actions: it may Move, or it may Rally. If a Rally is successful, the unit's status goes back to Solid. If it fails, the unit is removed from play. A Rally does count as the unit's action for the turn.
In checking morale and rallying, units will be evaluated as to strength ("Are half or more of the figures in the unit gone?"). This is determined against the total original number of figures in the unit, unless it has split. If the unit has split out as a subunit, from a larger original unit, the strength of the (sub)unit checking morale is that immediately after the most recent split. The quality of the unit checking morale (the Actor) is determined by the best quality figure in the unit. Transport never checks morale - drivers, guards, and attendants check as soldiers of the appropriate quality, or as Civilians if no quality has been indicated. The transport itself is not affected by the results of morale failure, but is left standing on the table.
1848! permits but does not require the design of specific scenarios. The "generic" scenario is a mission to pass through the region represented by the tabletop, raising volunteers and doing whatever harm is possible to the government forces - it is covered by the victory conditions described in the Winning and Losing section below. However, in addition to these generic criteria, players may wish to have scenario-specific mission goals, and their attendant forces and tabletop installations.
In all scenarios, there is a small portion of the tabletop specified as "friendly lines." This area can be modelled and situated somewhere on the tabletop, or can be (the default) simply indicated as being one table edge, or a portion of a table edge, beyond which is friendly territory. Unless specified otherwise by scenario, Player figures start the game behind friendly lines, and sometimes must return to them to win the game.
Scenario design can be quite intricate, or can involve the institution of some simple additional mission goals. Examples of typical scenarios are provided here. It should be noted that - especially for small Player forces - survival on the tabletop can be quite difficult. The normal levels of government forces generated by the games interface should be taken into account when scenarios are designed, so as not to require the impossible of players, and to achieve a good balance of forces.
Here is an example of a fairly straightforward scenario. The near short side of the table is designated as friendly lines, and a Lord's estate home is placed near the far end of the table. The referee will know (although the players do not) that the estate contains a force of 12 Veteran enemy infantry, with an officer and two NCOs. Among them is the much-hated local nobleman, an important man in the government. The Player forces consist of two units, each of 24 - one is a group of revolutionary Veterans, with a revolutionary leader and an NCO (either or both of whom may be mounted), and the other of revolutionary volunteers on foot, also with a revolutionary leader. The revolutionary Veterans are armed with percussion muskets, but the volunteers are only partially armed, and only a small number with firearms. Government troops with rifles will all have percussion muskets. The mission objective is to kill or capture the lord and to take his estate. The government troops may decide to venture forth from the estate, or may wait until the estate is attacked by the revolutionaries before being placed on the table. The lord himself is stubborn, and will not abandon his estate to a "rabble of revolting scum" unless directly attacked. At this point he may attempt to flee off the table.
Winning this scenario according to the mission goal will involve a high degree of skill and luck. Not only is there a significant enemy force which will probably need to be defeated, but the nobleman can easily escape unless his estate is surrounded. Treat success in terms of this mission criteria as in addition to other generic victory criteria, and as constituting an additional way in which the highest level of victory can be achieved (+ 100 points). If the lord escapes, but his estate is taken, that is counted as a marginal revolutionary victory (+ 10 points).
Lojos Kossuth, once the Regent-President of Hungary, is now forced to flee from the Russians who have defeated the Hungarian Revolution. He must make his way to the border of the Ottoman Empire, defying the border guards patrolling there. Kossuth himself is a Veteran/Officer and revolutionary leader, and is accompanied by a group of 24 of his revolutionary Veterans. While Kossuth may be mounted, his Veterans are on foot. All are armed with percussion muskets. He must make his way across the table lengthwise and exit the table edge in order to win.
There are 18 border guards set up within 12 inches of the far edge representing the border. They are Average soldiers armed with percussion muskets. They have an officer and an NCO with them, and will begin the game set up on the table. To win, Kossuth must make his way past the guards and claim his freedom in Turkey - no other victory conditions apply.
(Note that while Lajos Kossuth was in fact the Regent-President of Hungary until the Russians intervened, and did in fact flee across the border with the Ottoman Empire, everything else about this scenario is basically fictitious. Either Russians or Austrians could be used to portray government troops, and players should feel free to modify the scenario as they see fit.)
These scenarios will give you some idea of how they can be constructed, and overlaid on the existing "generic" scenario structure. Ideas for scenarios are easy to come by - a little bit of digging on Wikipedia is sure to produce some inspiration.
Unless otherwise specified by scenario, Player forces will start and may end the game behind friendly lines, whether that is a portion of the tabletop or a table edge. Note that, once on-table, any exit off a table edge means that the figures making the move are removed from play. During the course of play, many different figures will appear on the tabletop. This section provides information on how to implement such tabletop events, which are generated by the game interface.
Placing enemy troops and other Non-Player figures is done as announced by the program interface in a Player Event. The event will specify how many (if relevant) and what type of figures are to be placed on the table. For (non-Reactionary Mob) Civilians and Aristocrats the number is not important - two or three figures will suffice.
The location of the figures' deployment requires some basic guidelines. The program will specify a location in relation to the Player's current position. The current position is to be understood as referring not a to a specific Player unit, but to the Player forces as a whole. A notional circle (not actually a circle, but a perimeter ring) is drawn around all Player units, and their general facing (front, back, left, right) is determined. The distance provided by the Player Event will be from the closest point on that notional circle going in the indicated direction from its center (ie, measurement of "18 inches to the left front" starts on the left front point of the circle).
Sometimes, the indicated location will be off the table edge. In such cases, the deployment should be on the edge of the table in the indicated direction, with any portion of the measurement occurring off-table transferred instead to a movement along the table edge away from friendly lines. Thus, if I have a deployment indicated which is 18 inches away from my Player's current position to the left, and this places it 6 inches off the table, I will move it towards the table edge opposite that representing the friendly front lines, along the left table edge, a distance of 6 inches. The deployment will occur on the edge of the table at that location.
Any deployment occurring behind friendly lines is ignored. Deployment inside of friendly lines is not permitted. In those cases where the entire Player force does not have a clear front, rear, left and right, the direction toward friendly lines will be used as the rear.
Figures should be placed within 3 inches of each other (and grouped more tightly, typically) to make a valid unit formation. The specified point of appearance on the tabletop should be interpreted as a center point for the unit. Deployments will be forced to take tabletop terrain into account. It is up to the referee to determine exactly what the deployment will look like, but it is not unreasonable for Non-Player units to deploy according to the terrain. Units will not, for example, appear in the middle of a river at a non-fordable point.
Units will also not appear inside of other units, but will instead be placed adjacent to them. There is no minimum distance to other Non-Player units - the minimum distance towards Player units will be the distance indicated in the Player Event (approximately, to account for unit deployment). Once deployed, a Non-Player unit must wait for a Non-Player initiative to act. Units will not appear on the tabletop and immediately make an action unless this is indicated by the program interface.
When government troops are deployed, there will always be at least one NCO, and, for groups of more than five, there will typically also be an officer. Such officers may be searched/interrogated by Players once they are vanquished.
The referee should use their judgement in the placement of enemy troops - it is not unreasonable for the referee to alter placement or even cause an enemy unit to simply not appear, if that will be conducive to a better game (typically, the latter happens when there are already crushing numbers of government troops on the table).
There are also terrain items which will require placement on the tabletop: mainly, these are government strongpoints. Once placed, the occupants of the stronpoint are sometimes unknown - in these cases they will only be determined by Player action ("Scout Government Strongpoint"). The placement of strongpoints is the same as that for Non-Player figures. When the location of any of these is indicated by the game interface, even if only by information gathered from Civilians, Aristocrats, or government Officers, the appropriate terrain piece should be immediately placed on the table, along with their occupants if known.
There may be other events which require terrain: political prisoners, ammunition dumps, and other such items may be found already housed in a building, or may be stored in a tent or similar, in which case the tent should be placed on the table when its existence is discovered. Structures which are already on the table at the start of play, but whose inhabitants or contents are not specified by the scenario may be explored by Players ("Search Structure") to determine them.
Deployments should be made by the referee using a degree of common sense and judgement. Adjustments to the location and distance of a deployment to reflect common sense are allowed. Whining about this on the Players' part is grounds for a determination of cowardice and summary execution by the referee. It is even allowed for referees to simply ignore Player Events if these would materially undermine the game (for example, if Player units are already getting massacred).
Players will win or lose the game, based on the following criteria, unless otherwise established by scenario. It should be noted that, in multi-player games, a decision should be made as to whether the entire revolutionary force will win or lose as a whole, or whether this will be determined at the level of each player's command.
The game is not focused on winning or losing, so much as recreating the type of conflict experienced by the participants in the revolutionary struggles of 1848. For those who wish to have a way of determining victory, however, a simple point system is offered. Scenario designers should extend this to cover specific goals in each scenario, as relevant.
The table below offers a way of winning and losing points, depending on tabletop events during play:
| Event | Points |
| For each revolutionary leader made casualty or lost through morale failure | - 5 |
| For each revolutionary veteran made casualty or lost through morale failure | - 2 |
| For each revolutionary volunteer (or ex-government soldier) made casualty or lost through morale failure | - 1 |
| For each civilian recruited to the cause | + 1 |
| For each government conscript soldier recruited to the cause | + 2 |
| For each average government soldier recruited to the cause | +4 |
| For each (non-recruited) government conscript soldier made casualty | + 1 |
| For each (non-recruited) average government soldier made casualty | + 2 |
| For each veteran government soldier made casualty | + 3 |
| For the capture of an enemy supply dump/convoy | + 5 |
| For the capture of sensitive government documents | + 5 |
| For freeing political prisoners | + 5 |
| For capturing cash reserves or other significant store of money | + 10 |
| For taking government strongpoint | + 5 |
| For capturing or killing government officers/aristocrats | + 5 |
| For successfully negotiating a government concession to revolutionary demands | + 500 (automatic win) |
Any positive point total will reflect at least a technical victory, representing a net gain for the cause of the revolution. (Note that killing members of reactionary mobs is not rewarded with points, as this can lead to rumors of the massacre of civilians.) If point totals are being used, they should be recorded so that future wins can be understood in light of earlier games.
Games should be played until terminated by scenario-specific victory conditions, or until an obvious stopping point is reached (all government forces on the table are defeated and known objectives taken, etc.) If a game goes on without end, the revolutionary forces will all end up defeated, as there is potentially no limit to the number of government troops which may appear during play.
It is not uncommon for the revolutionary forces to get wiped out, and players should be prepared for this. If all revolutionary forces are eliminated, a revolutionary victory is still possible on points - the players have just become martyrs to the cause!
One of the great things about skirmish games is the way in which they use non-typical figures (such as civilians of different types, command figures, etc.) The conflicts of 1848 provide an opportunity to paint some truly excellent-looking miniatures, with many colorful uniforms, and revolutionaries who are full of character. The down-side of this is the relative difficulty of finding the figures you are looking for (this will depend, of course, on which revolution you choose to depict - Garibaldi in Rome or the barricades of Paris in 1848 (etc.) are relatively easy, but some other revolutions may require a lot more research and figure conversion. Because you are not raising entire armies, it is possible to select a single unit of each type to be represented (revolutionary veterns, revolutionary volunteers, government infantry, government cavalry, etc.) and raise just that unit (or, for Player Figures, possibly two or three).
All figures in this game are meant to be individually mounted - exact base sizes are not important, and multiple mounting can be used for artillery pieces, convoys, etc., if desired. Being the normal scale for skirmish wargames, 25mm/28mm is assumed, but there is no reason why 15mm figures could not be used (you may wish to substitute centimeters for inches) or larger 40mm (or even 54mm) figures wouldn't work (you may wish to double distances).
As a consequence of the random appearance of different figure types during game play, it is difficult to specify an exact number of figures needed. This section provides some guidelines regarding the expected number of figures required. If availability of a needed figure type becomes an issue during play, the referee should feel free to make substitutions, bearing in mind that Veteran troops are far better than Conscripts (numbers appearing can be adjusted by a figure or two).
Player Figures: This is a known quantity, determined by the players or by scenario. Appropriate numbers of Player figures of the desired types need to be available, typically 12 to 24 figures for infantry (with a leader and NCO) per unit. Cavalry units will be of between 6 and 12 figures, again with a leader and/or NCO. Artillery should have a crew of 4 to 6 figures and a gun (a limber and a driver or two are also nice if available). The game can be played with one or more player units, with 3 or 4 being ideal, and more than six becoming unwieldy. It is normal (but not required) to have a mounted commanding officer figure (or, if desired, on foot) who is the senior revolutionary leader, and/or one per unit or player.
Note that revolutionary volunteers - as armed civilians - can double as reactionary mob members. There should be at least a dozen spare armed civilian figures available (in addition to player units at games' start) to cover the appearance of recruits and reactionary mobs. Among these should be a couple of revolutionary (and counter-revolutionary) leader figures.
Government Infantry: A total of three or four dozen government infantry are needed, including officers, NCOs, and (if you use them) standard bearers, musicians, etc. (these count as ordinary soldiers in game terms, but can double as handy markers for indicating quality and allegiance - paint up some standard bearers with revolutionary flags in case of mutiny!). You may wish to have different figures for different classes of government troops (for Baden in 1848/1849 I use Karlsruhe stadtwehr for conscripts, Baden line infantry for average troops, and Prussian jaegers for veterans). If this approach is used, 24 conscripts, 18 average troops, and a dozen veterans will cover the bases for a medium-sized game.
Government Cavalry: As for infantry, but fewer figures are needed, as they occur less frequently during play. Six figures would be a bare minimum, and twice that number would generally suffice. Note that some cavalry figures (especially officers) can often do double-duty. Hussars are particularly good for this, as they would frequently be used as scouts and messengers, and might be found hanging around headquarters.
Government Artillery: A single government gun will generally be sufficient, with four crewmen. Two guns with crew should provide sufficient coverage for almost any game. Note that, since artillerists may defect individually without their gun, it may be useful to have a few musket-armed artillerists to use when this happens.
Aristocrats: The number of aristocrats can be minimal, as they are used primarily in the game as markers, being removed once interrogated. A few of these will generally suffice, on foot and, if desired, mounted. (Front Rank has some Napoleonic civilian figures which are perfect for this, both men and women, with a mounted gentleman available.)
Government Officers: A small number of these are needed, although regular officers both mounted and on foot can do double duty. Two or three "special" officers are useful, to take the part of senior government representatives and the commanding generals of headquarters. Some or all of these figures should be mounted, as befits their rank.
Reactionary Mobs (and Leaders): These figures may be the same as those used for revolutionary volunteers, but a dozen or so should be available which are not part of player units at game set-up. There should be some counter-revolutionary leaders (we use armed priests) to lead such groups.
Government Headquarters: This is a group of senior government officers and their guards. They would typically be mounted, being senior military personnel. Line officers (and, as guards, soldiers) can be used, and having the odd aristocrat in the mix would not always be inappropriate.
Civilians: A small number of unarmed civilians should be available. These - like aristocrats - are generally markers in terms of game play, and are removed once they have been consulted or recruited. A half dozen is sufficient.
Government Convoys: These can be represented with pack mules or horses, or with carts or wagons, as desired. A single convoy (or perhaps two) will usually cover all contingencies.
Political Prisoners: You may use revolutionary leader figures for this, or may wish to depict them unarmed and in chains. A small number should cover the bases.
Figures are not always easy to find, and will, of course, vary based on which revolution you are depicting. In many cases, Napoleonic troops will work for government forces. Alternately, figures for the European conflicts of the period from 1850-1870 may prove useful. Some excellent sets which you may find useful are the rioters from Perry Miniatrures American Civil War line (they include women and children as well as men, and are variously armed), the Chouan Rebels made by Trent Miniatures, and figures from the 19th Century Revolutions line available from Steve Barber. The Russian Generals pack from Wargames Foundry's Crimean War range is very good for government officers and generals of the period. Figures for both the Crimean War and the First Carlist War are often useful for doing this period in cases where dedicated ranges do not exist (Crimean Russians have the early-style helmet so common in 1848). I would be remiss if I did not mention the excellent 28mm figures produced by Gringo40s for doing Garibaldi's wars - the Garibaldini are good for many veteran revolutionaries of the period, as are the Picciotti/Briganti. The Neapolitans are classic Bourbon troops of the mid-19th century, useful for many conflicts outside of the Two Sicilies. Irregular Miniatures and Mirliton are also sources to consider, depending on your needs.